
For a few years now, I’ve been lucky to be able to extend my cruising, and for all intents and purposes consider myself a year-round boater. I’ve enjoyed four season cruising thanks to free time and decent weather. Mostly I’d end up tied to a dock, plugged in to 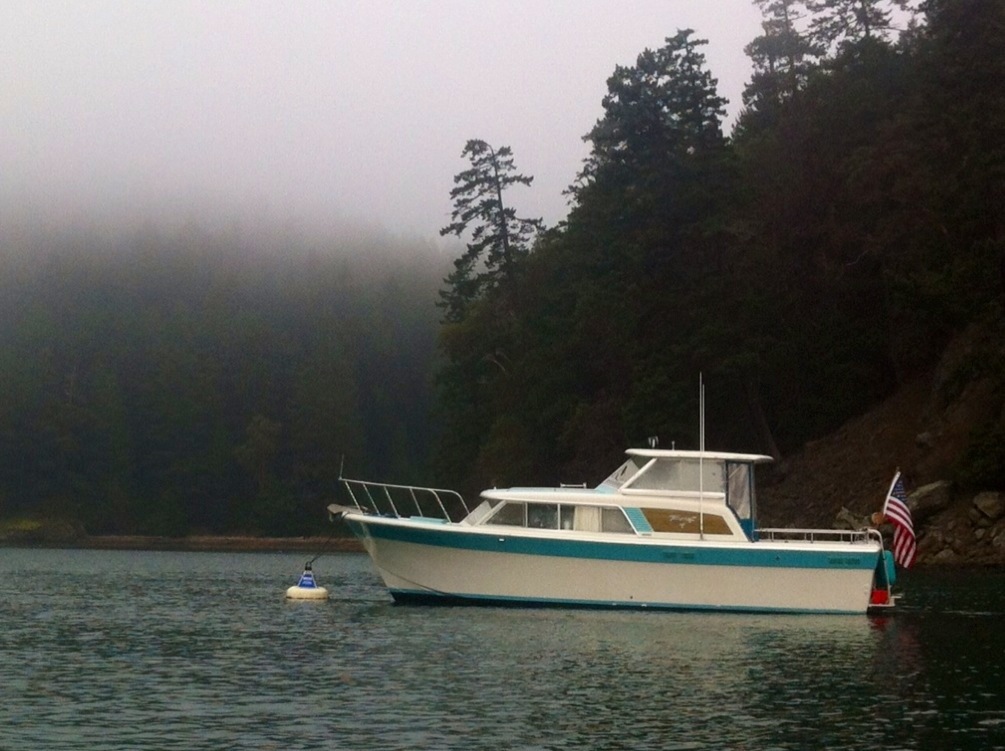 shore power to keep the boat warm, but that isn’t where I want to spend all my time.
I’ve always wanted to explore the best anchorages in the colder months when the crowds are at home, and experience the changes of the landscape with the changes of the seasons. Oh, I’ve spent a few nights on the hook in the winter time, and it’s totally doable – It just gets butt cold! Even in the summer, some dry heat will be a welcome treat on damp mornings, evenings, and when caught by the rain.
This is a project that I’ve considered over the years, but the cost of the equipment and considering mounting locations made me squeamish, and I’d put it off another year. Like a lot of other projects on the boat, paying someone to do it was simply not an option, as it would be totally cost-prohibitive for me.
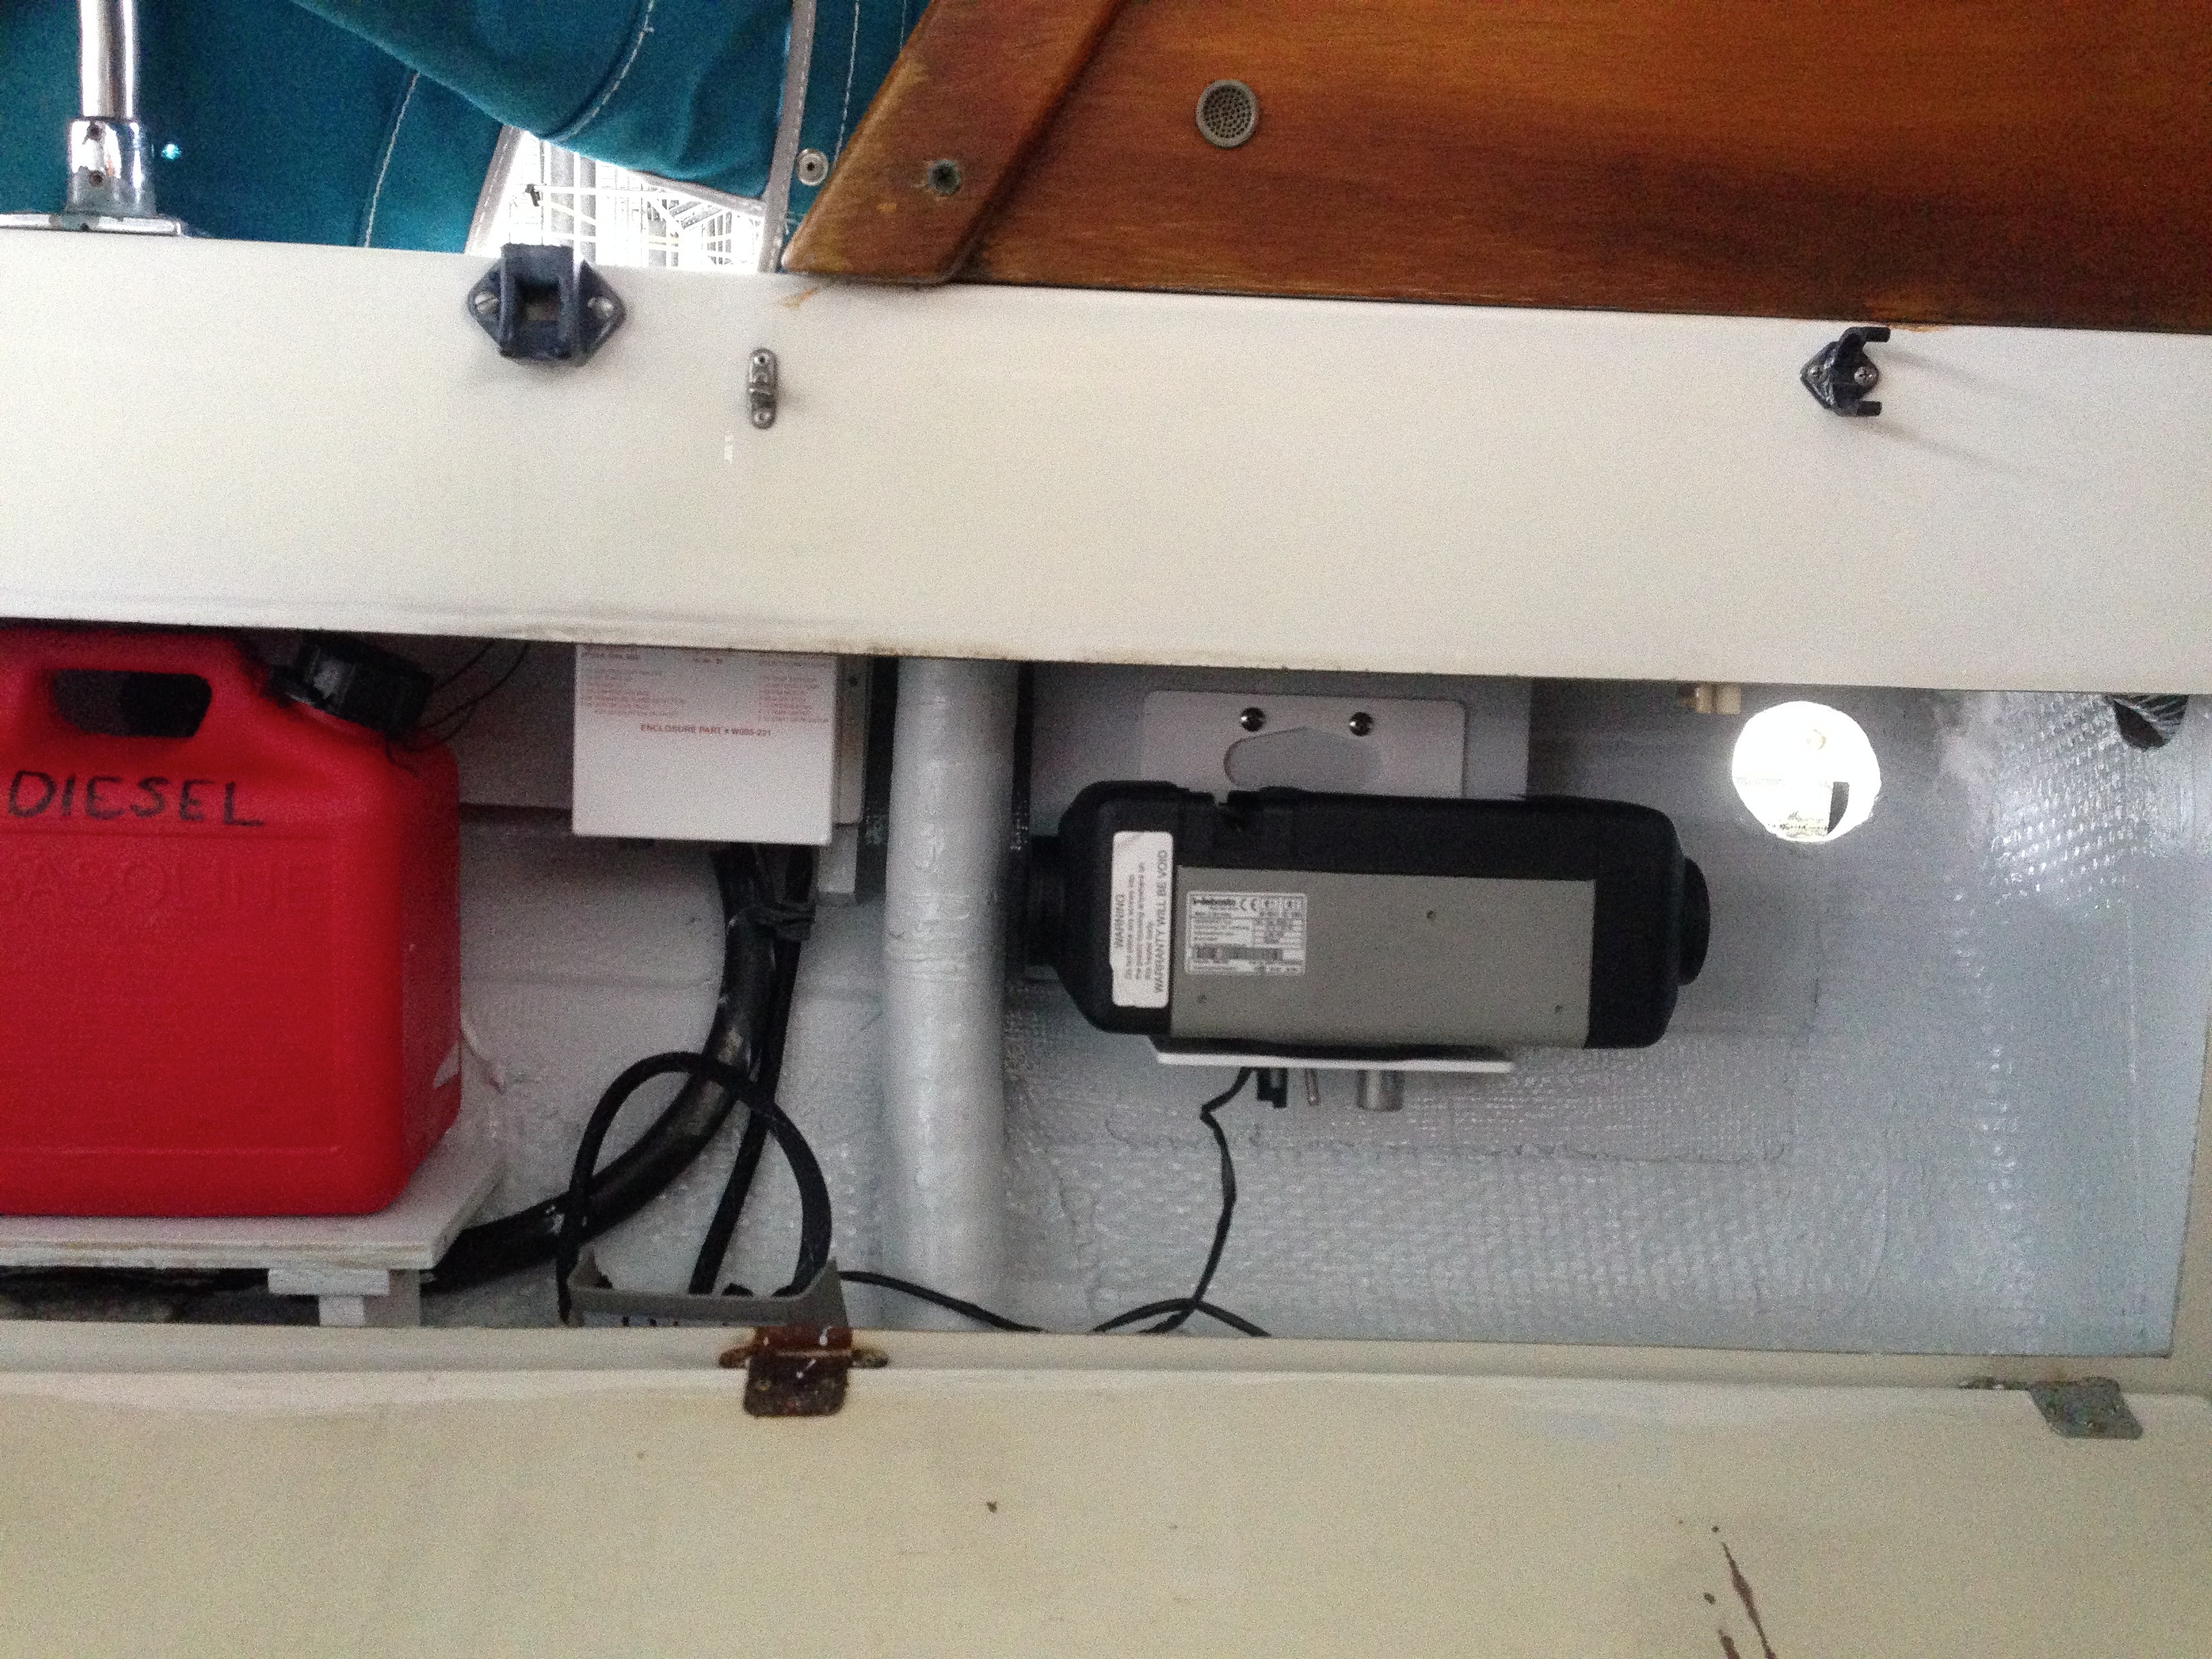
I’m installing a Webasto AT2000 diesel furnace. I purchased mine “used” off e-bay. Advertised as a display model for a vendor on the Great Lakes, it has no signs of ever running that I can find. It originally came from Sure Marine in Seattle, and came with their Sure Wire board. I purchased additional parts I needed for the install from Sure Marine, which included, ducting, a mounting bracket, and exhaust.
Planning has been the toughest part of the project. Figuring out where to mount the heater, where to run ducting, exhaust, and air intake is nothing short of a challenge, and it deserves thought. I want to do this right, and don’t want to have to “un-do” things, especially the huge hole I’ll need to cut in the side of the boat for the exhaust. That needs to be right the first time.
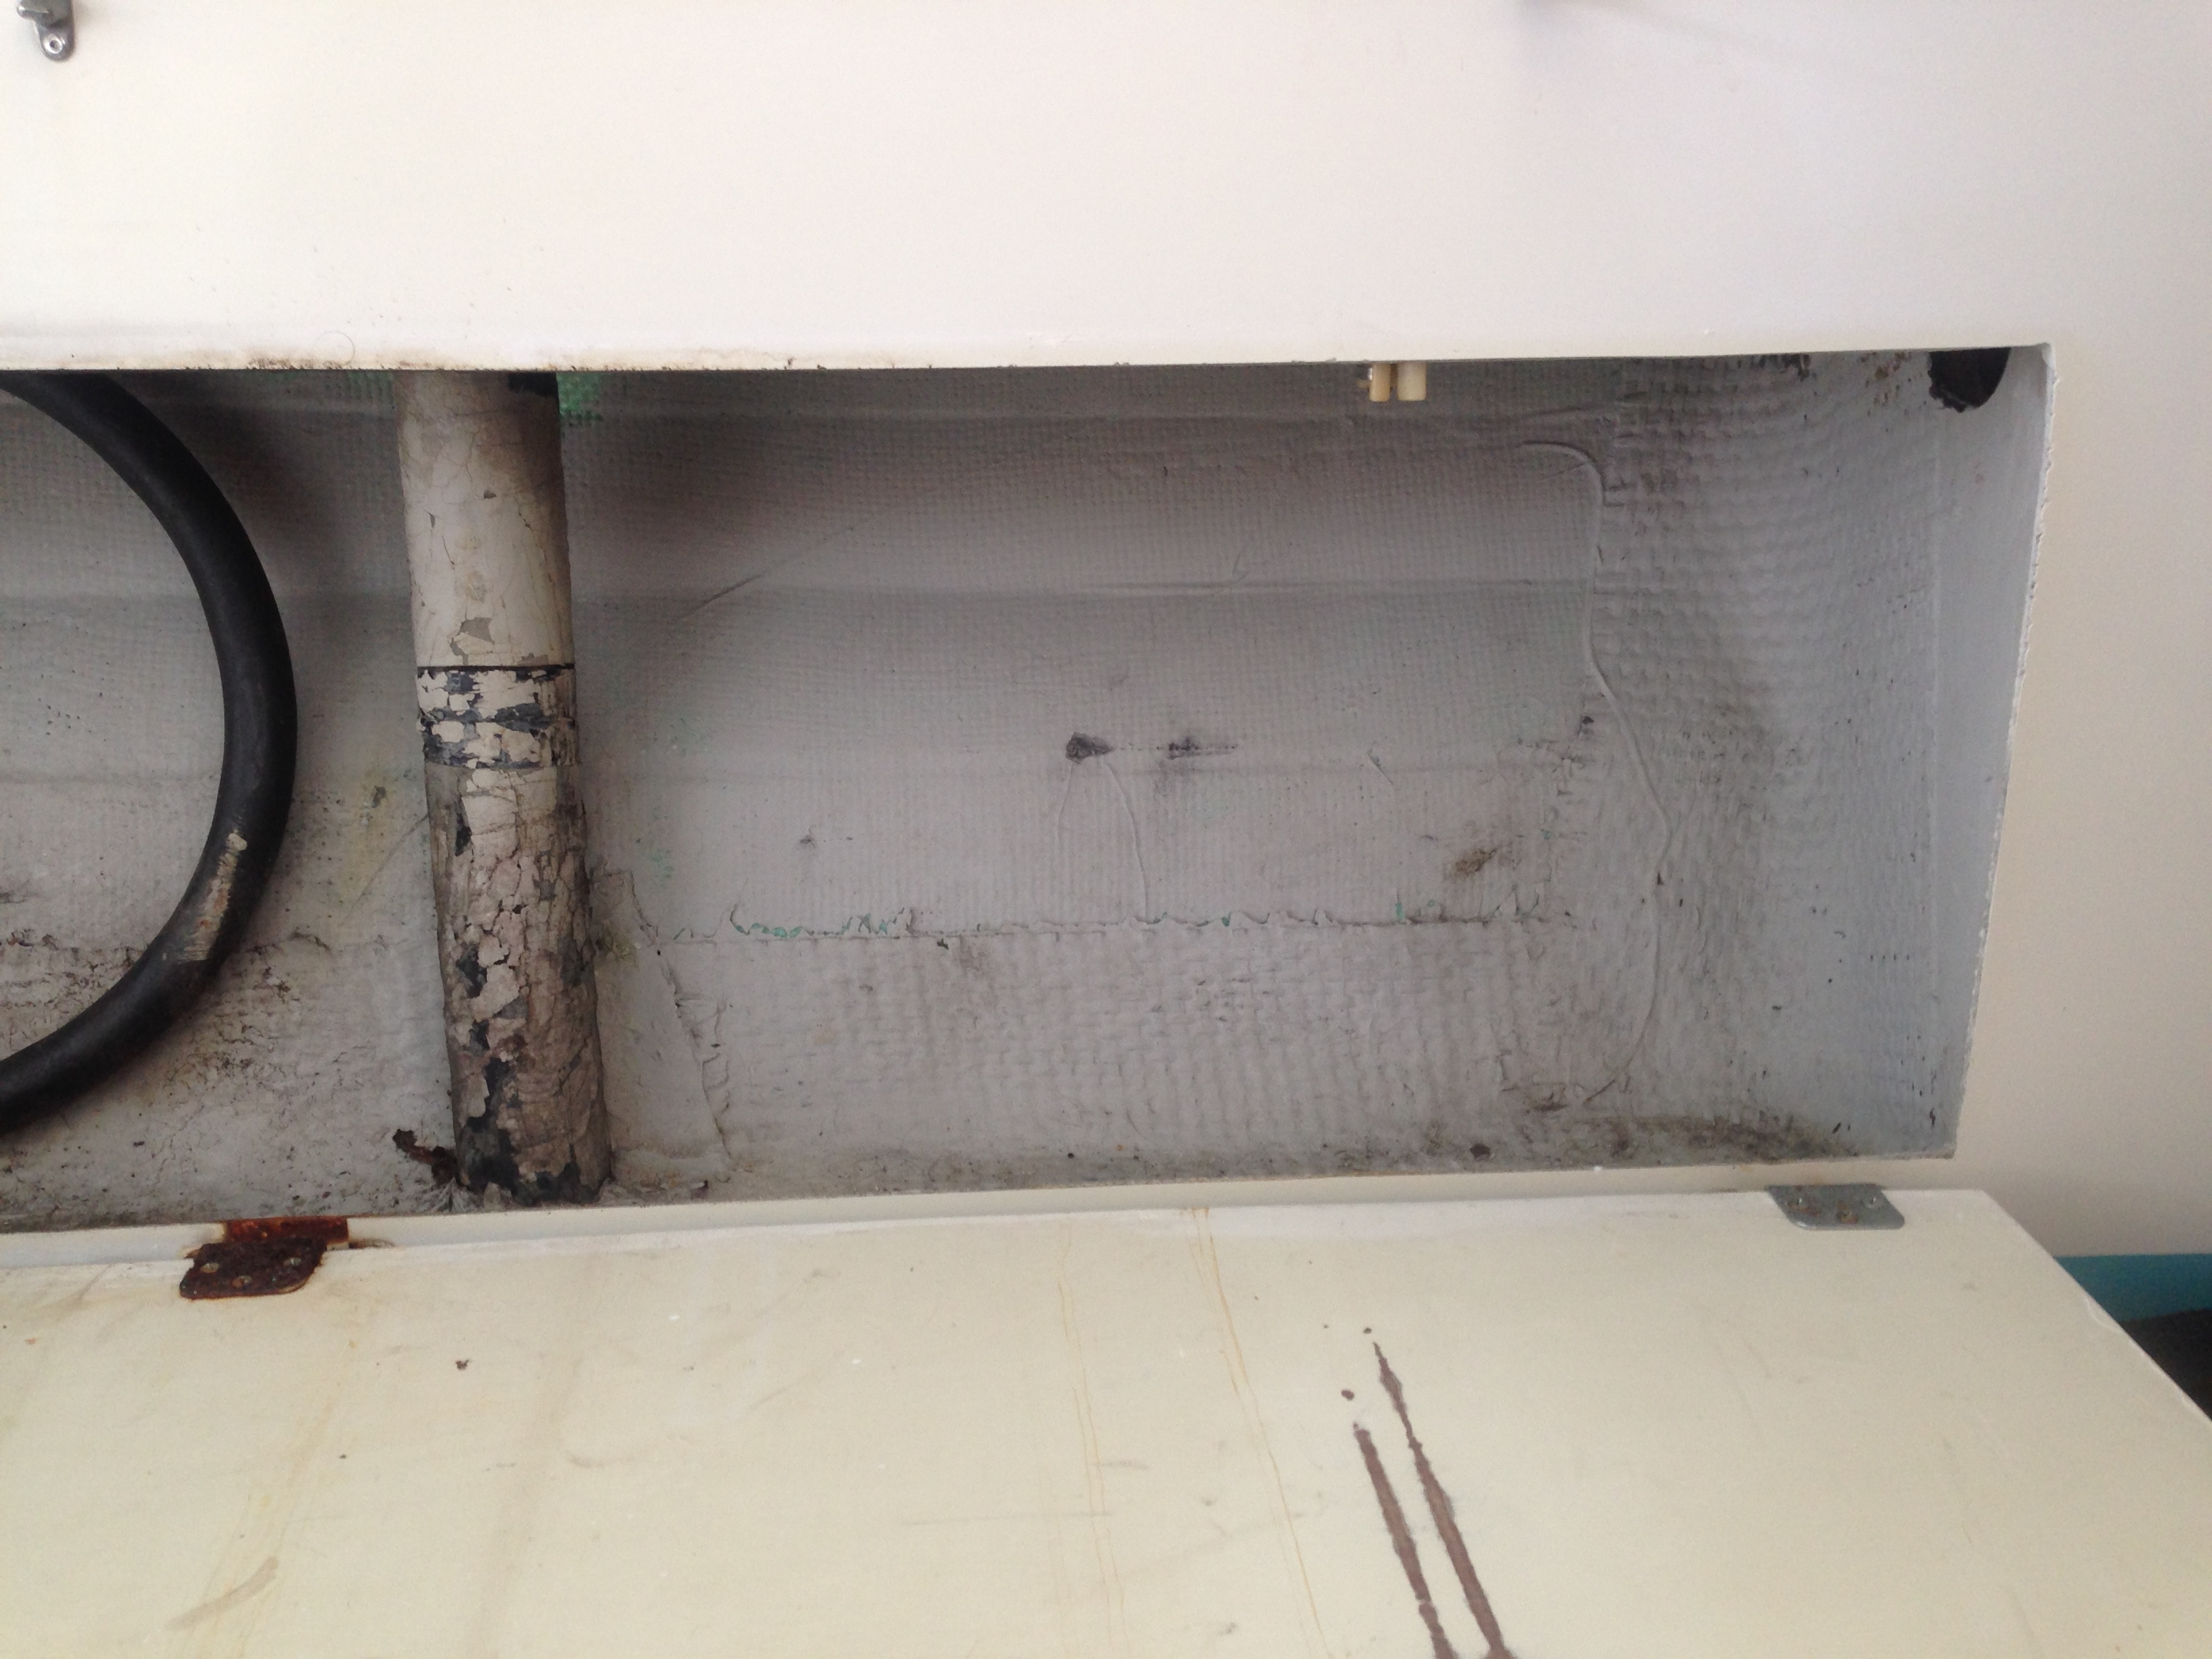
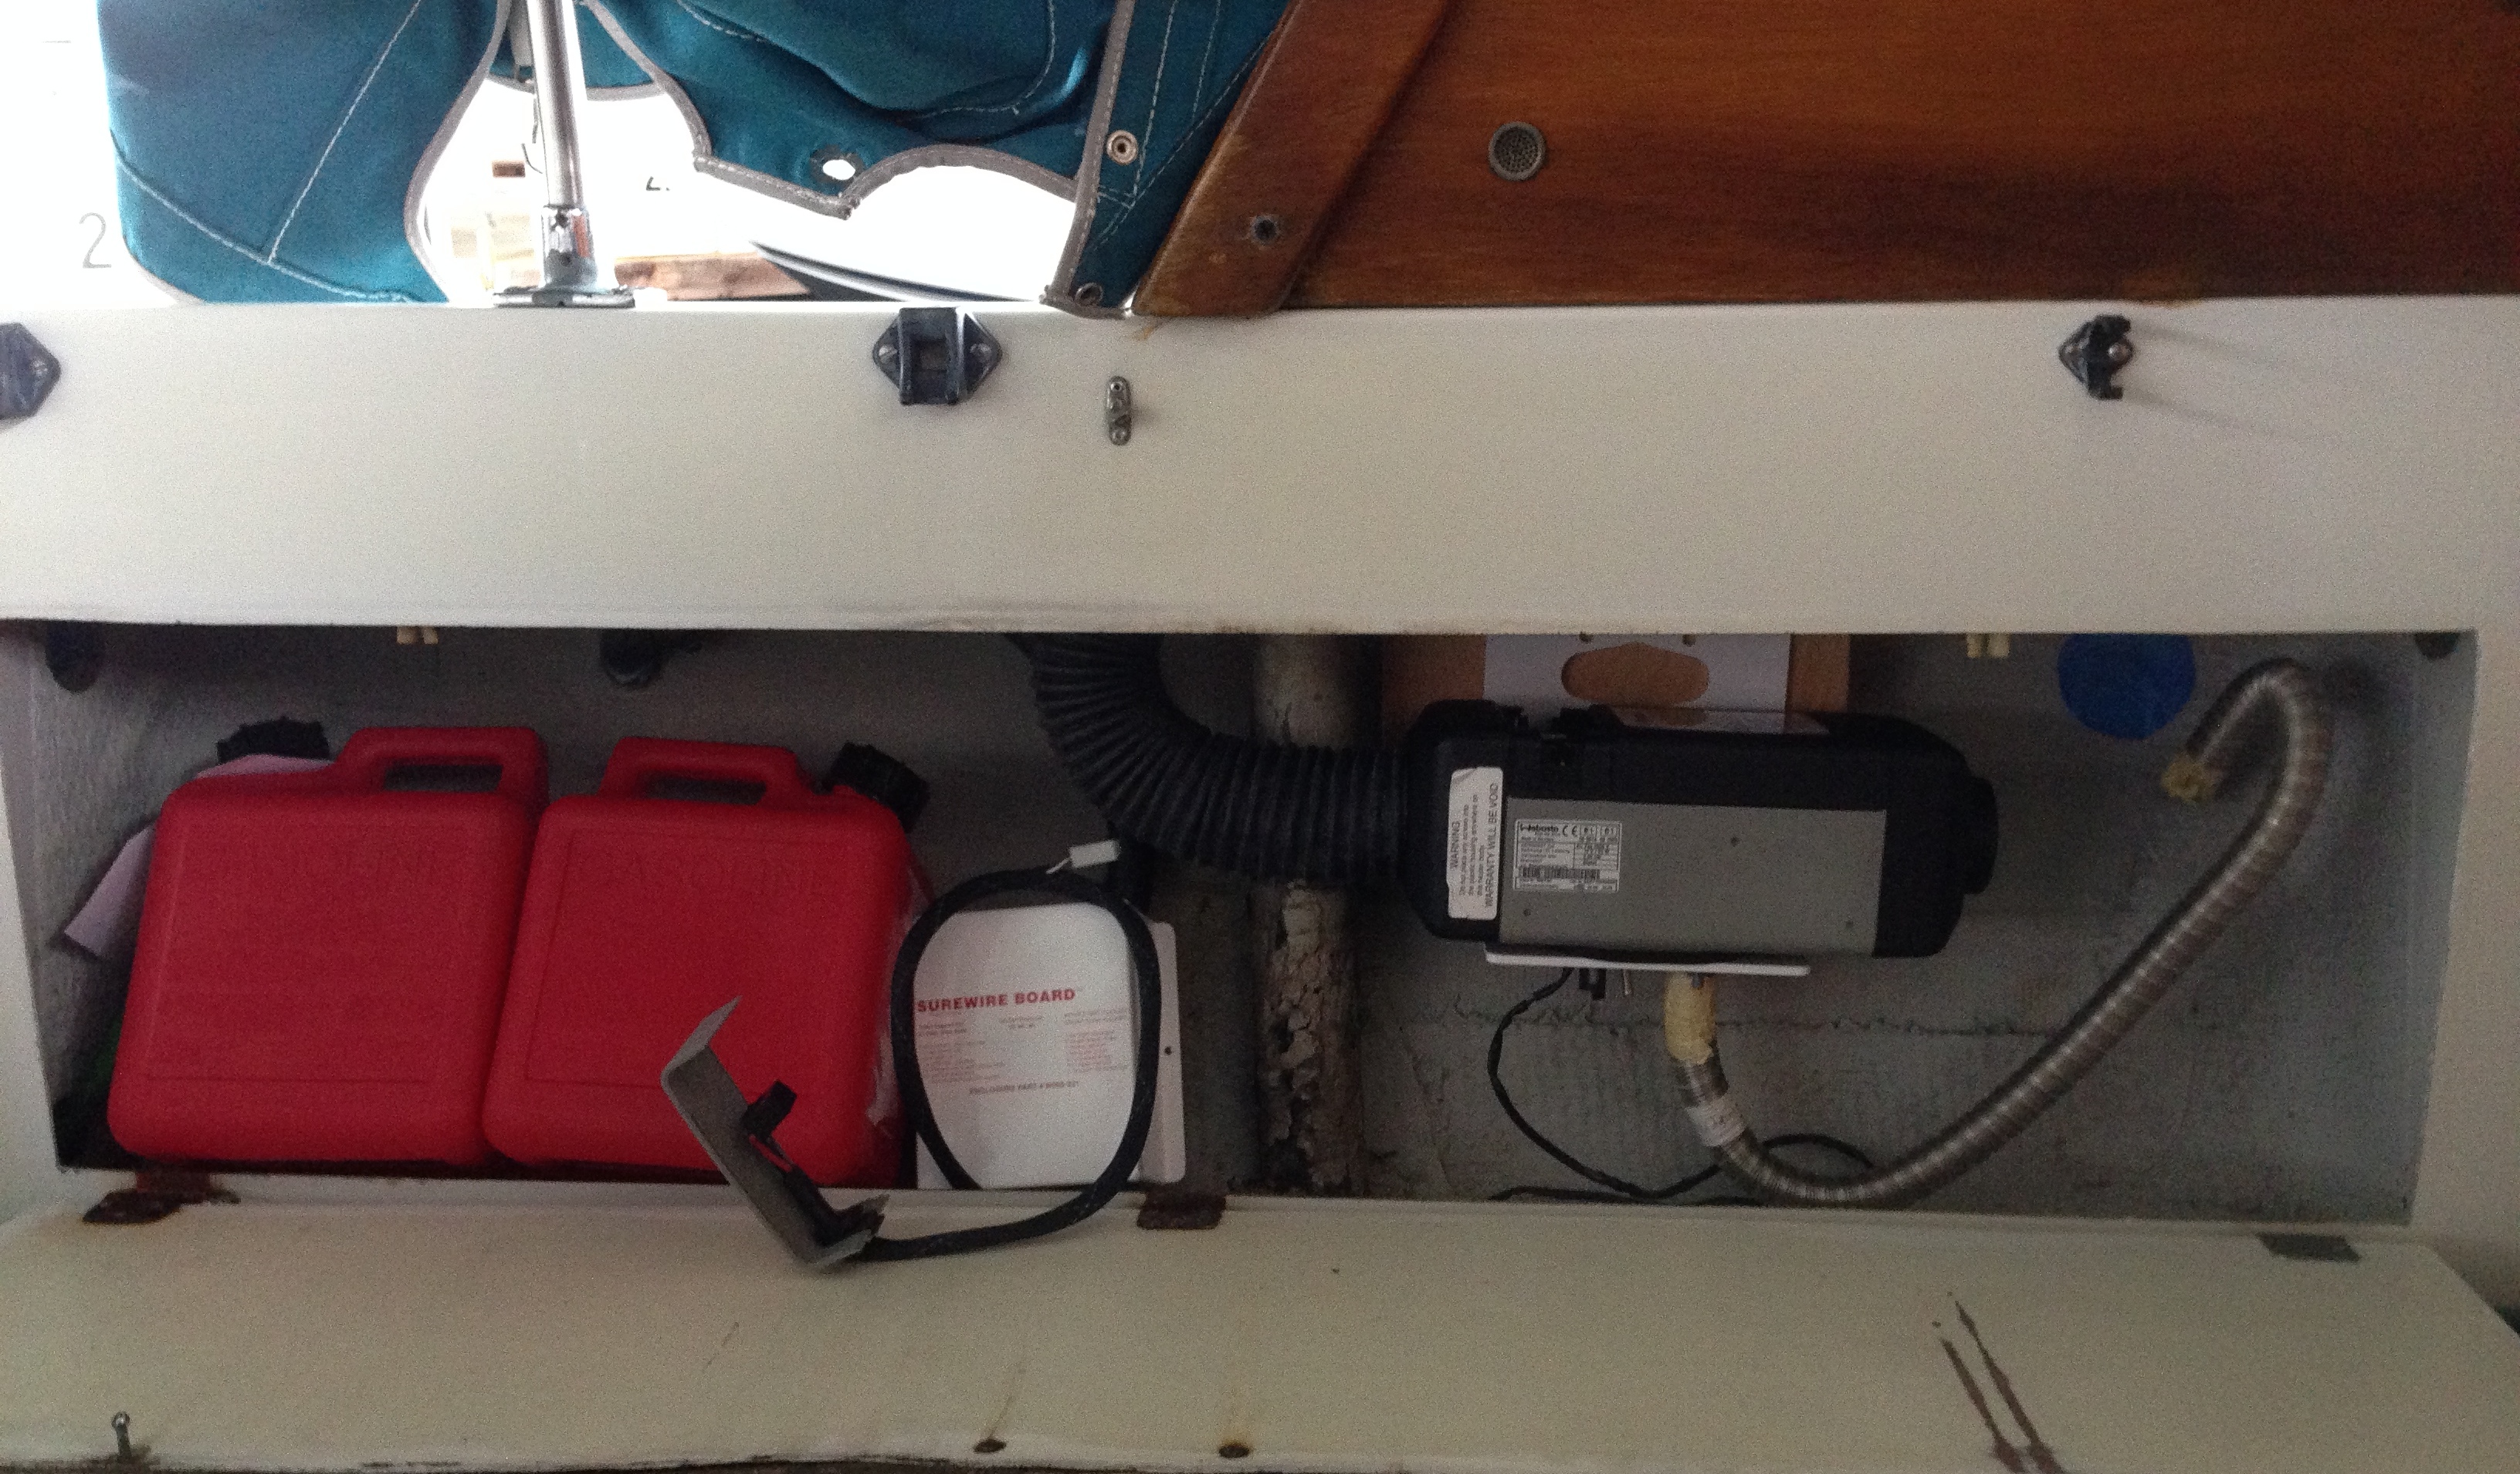
After contemplating a few different locations and extensive deliberation, I’ve decided to mount the heater in a cockpit locker. I’ll be able to fit all of the bits and pieces, including a small fuel tank in this locker, formerly used to hold a bunch of random stuff that I rarely used, and either didn’t need or I could find another home for. After removing the eight old stinky spare dock lines, a couple of ratty old fishing rods, and other various odds and ends, I now have an empty locker. It could use some cleanup, of course.
To get an idea how everything is going to fit in the space, I began to lay out how I wanted it to be. I constructed a mounting pad for the heater bracket, and played with different locations for the fuel tanks and Sure Wire board. To help me visualize where the exhaust thru-hull needed to be, I cut a piece of masking tape the same diameter to help mock up the exhaust run.
 Once satisfied with the general location of things, I identified the location for the exhaust thru-hull on the outside of the hull and began the process of preparing myself for plunging a three-inch hole saw in the side of my boat.
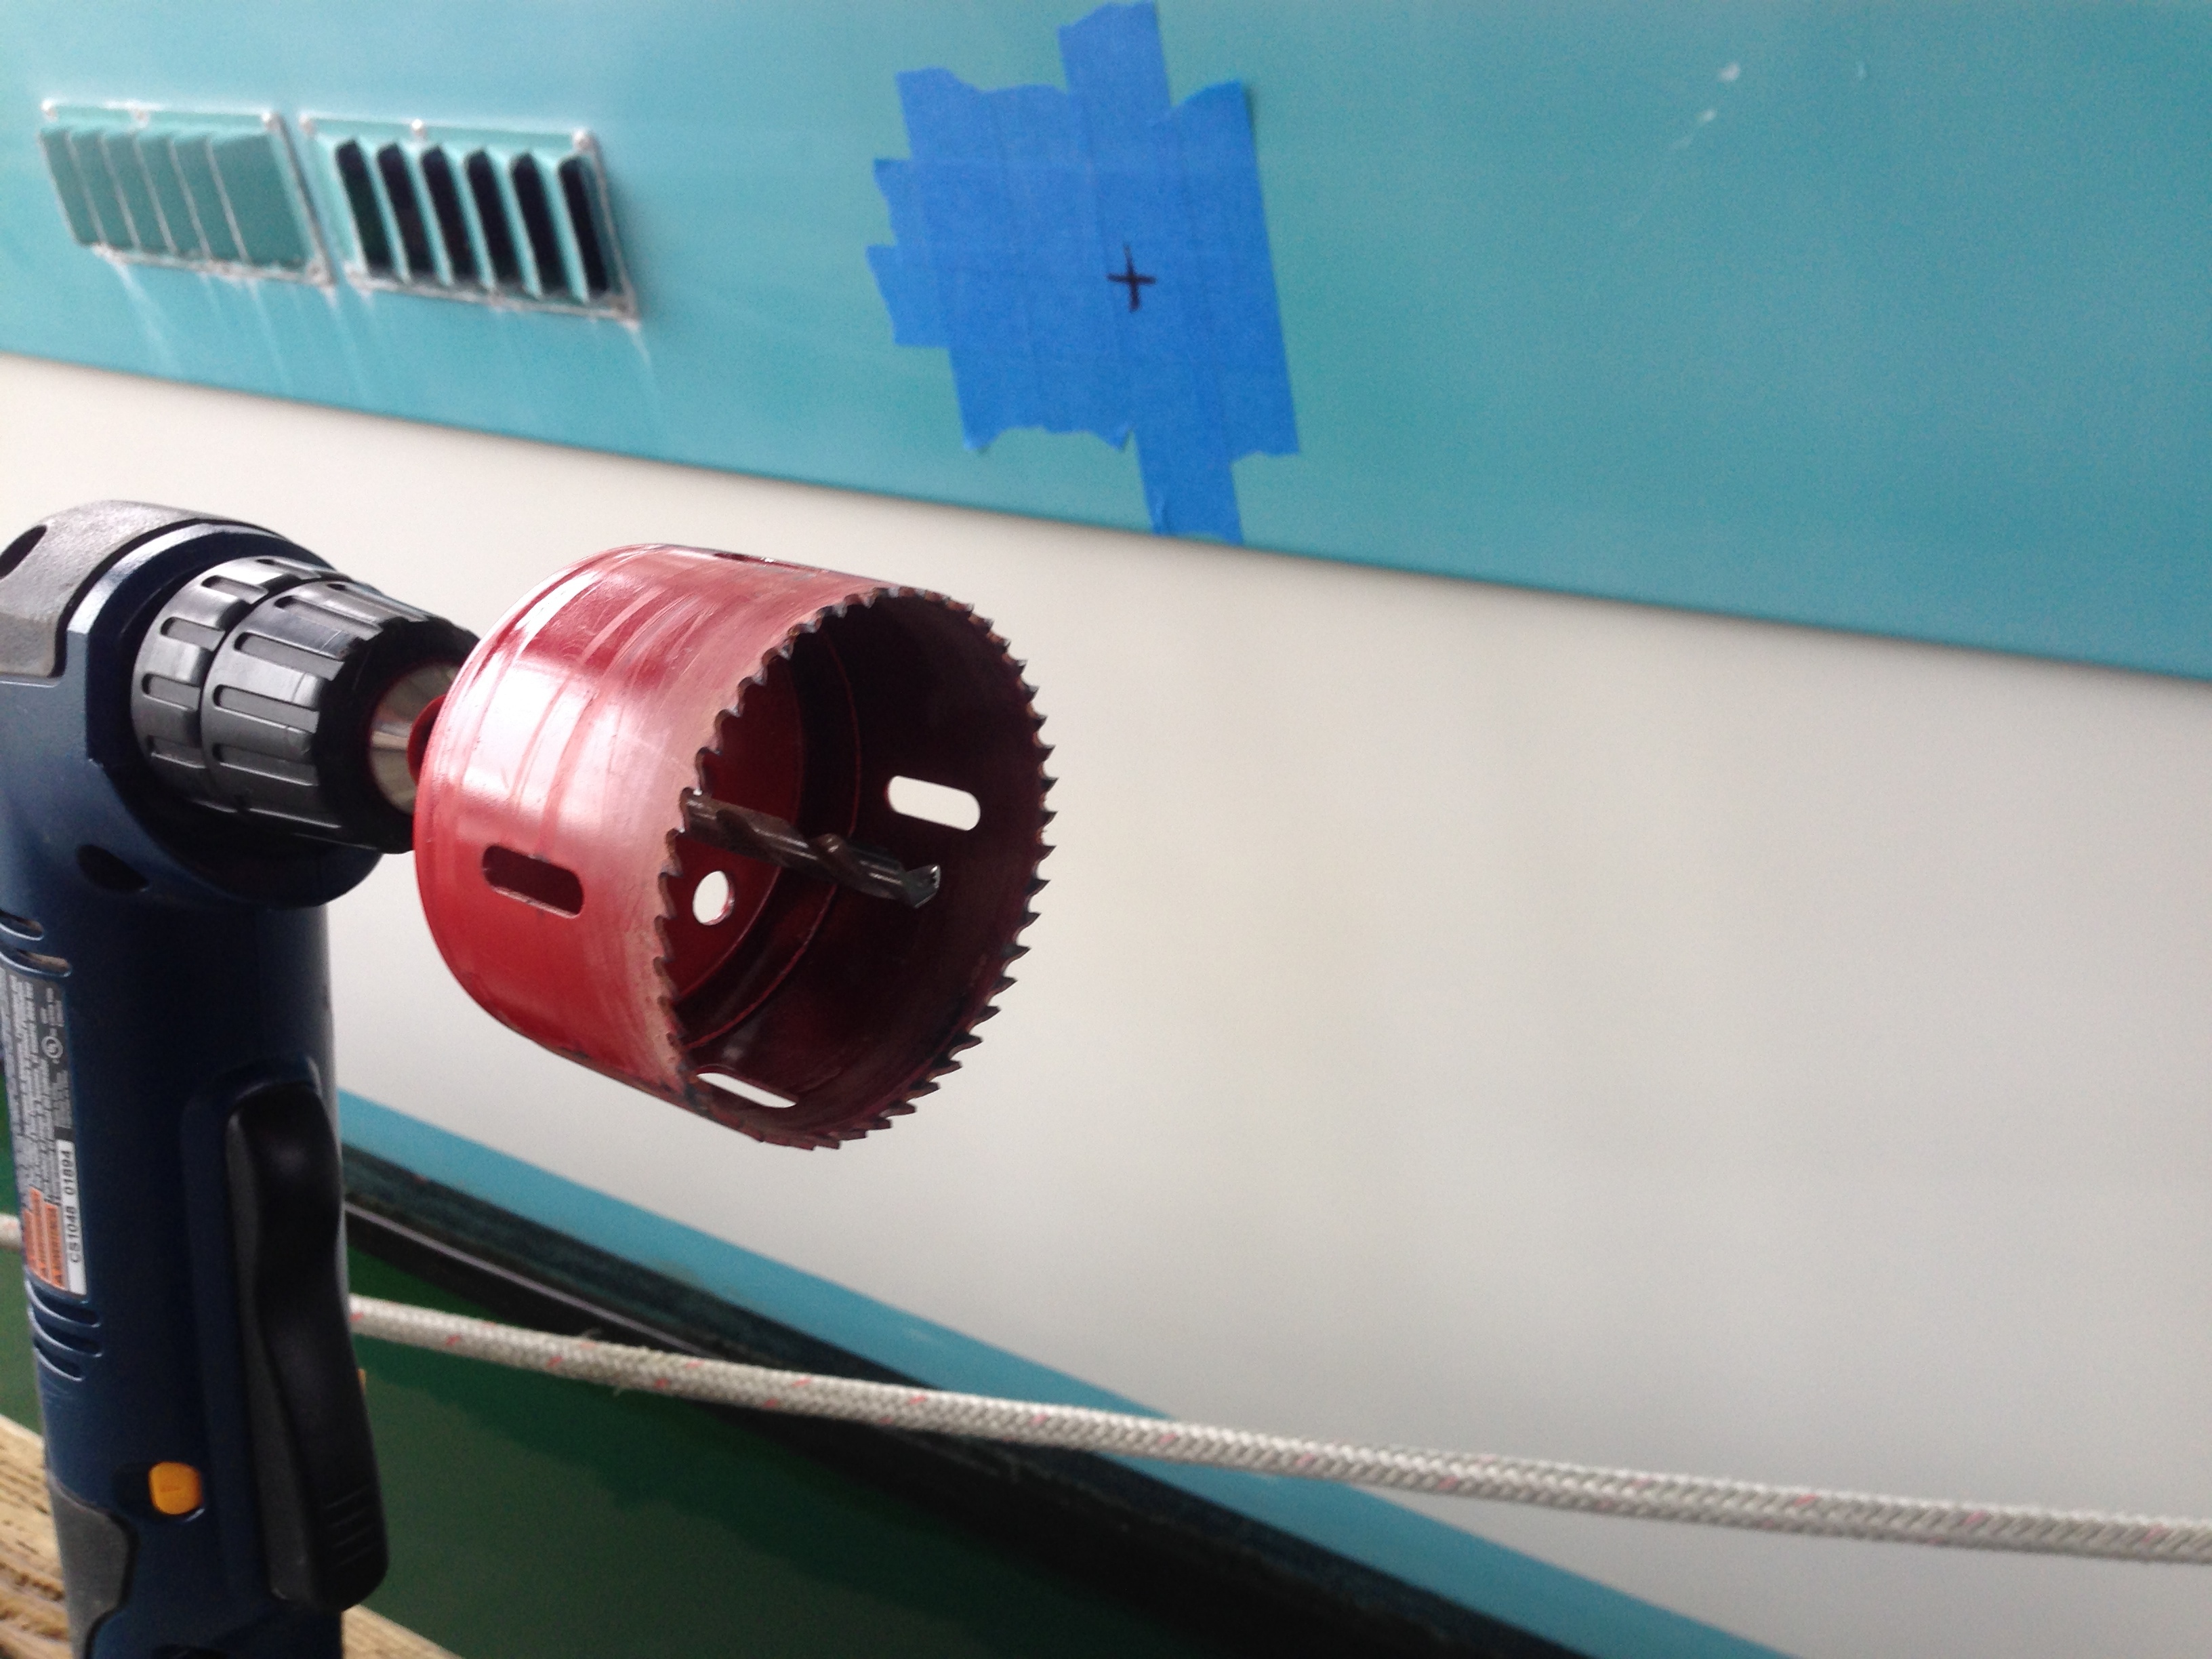 As the old saying goes, “Measure twice, cut once”. I’m pretty sure I measured a dozen times, then paced the dock for a moment, panting. Finally, I worked up the nerve, and sat on the dock and prepared to cut a big ‘ol three inch hole in the side of my boat.
A good tip when using a hole saw, especially on gelcoat, begin the cut with the drill reversed. This scores the gelcoat before actually doing any cutting, minimizing any chipping, and makes for a very nice cut.
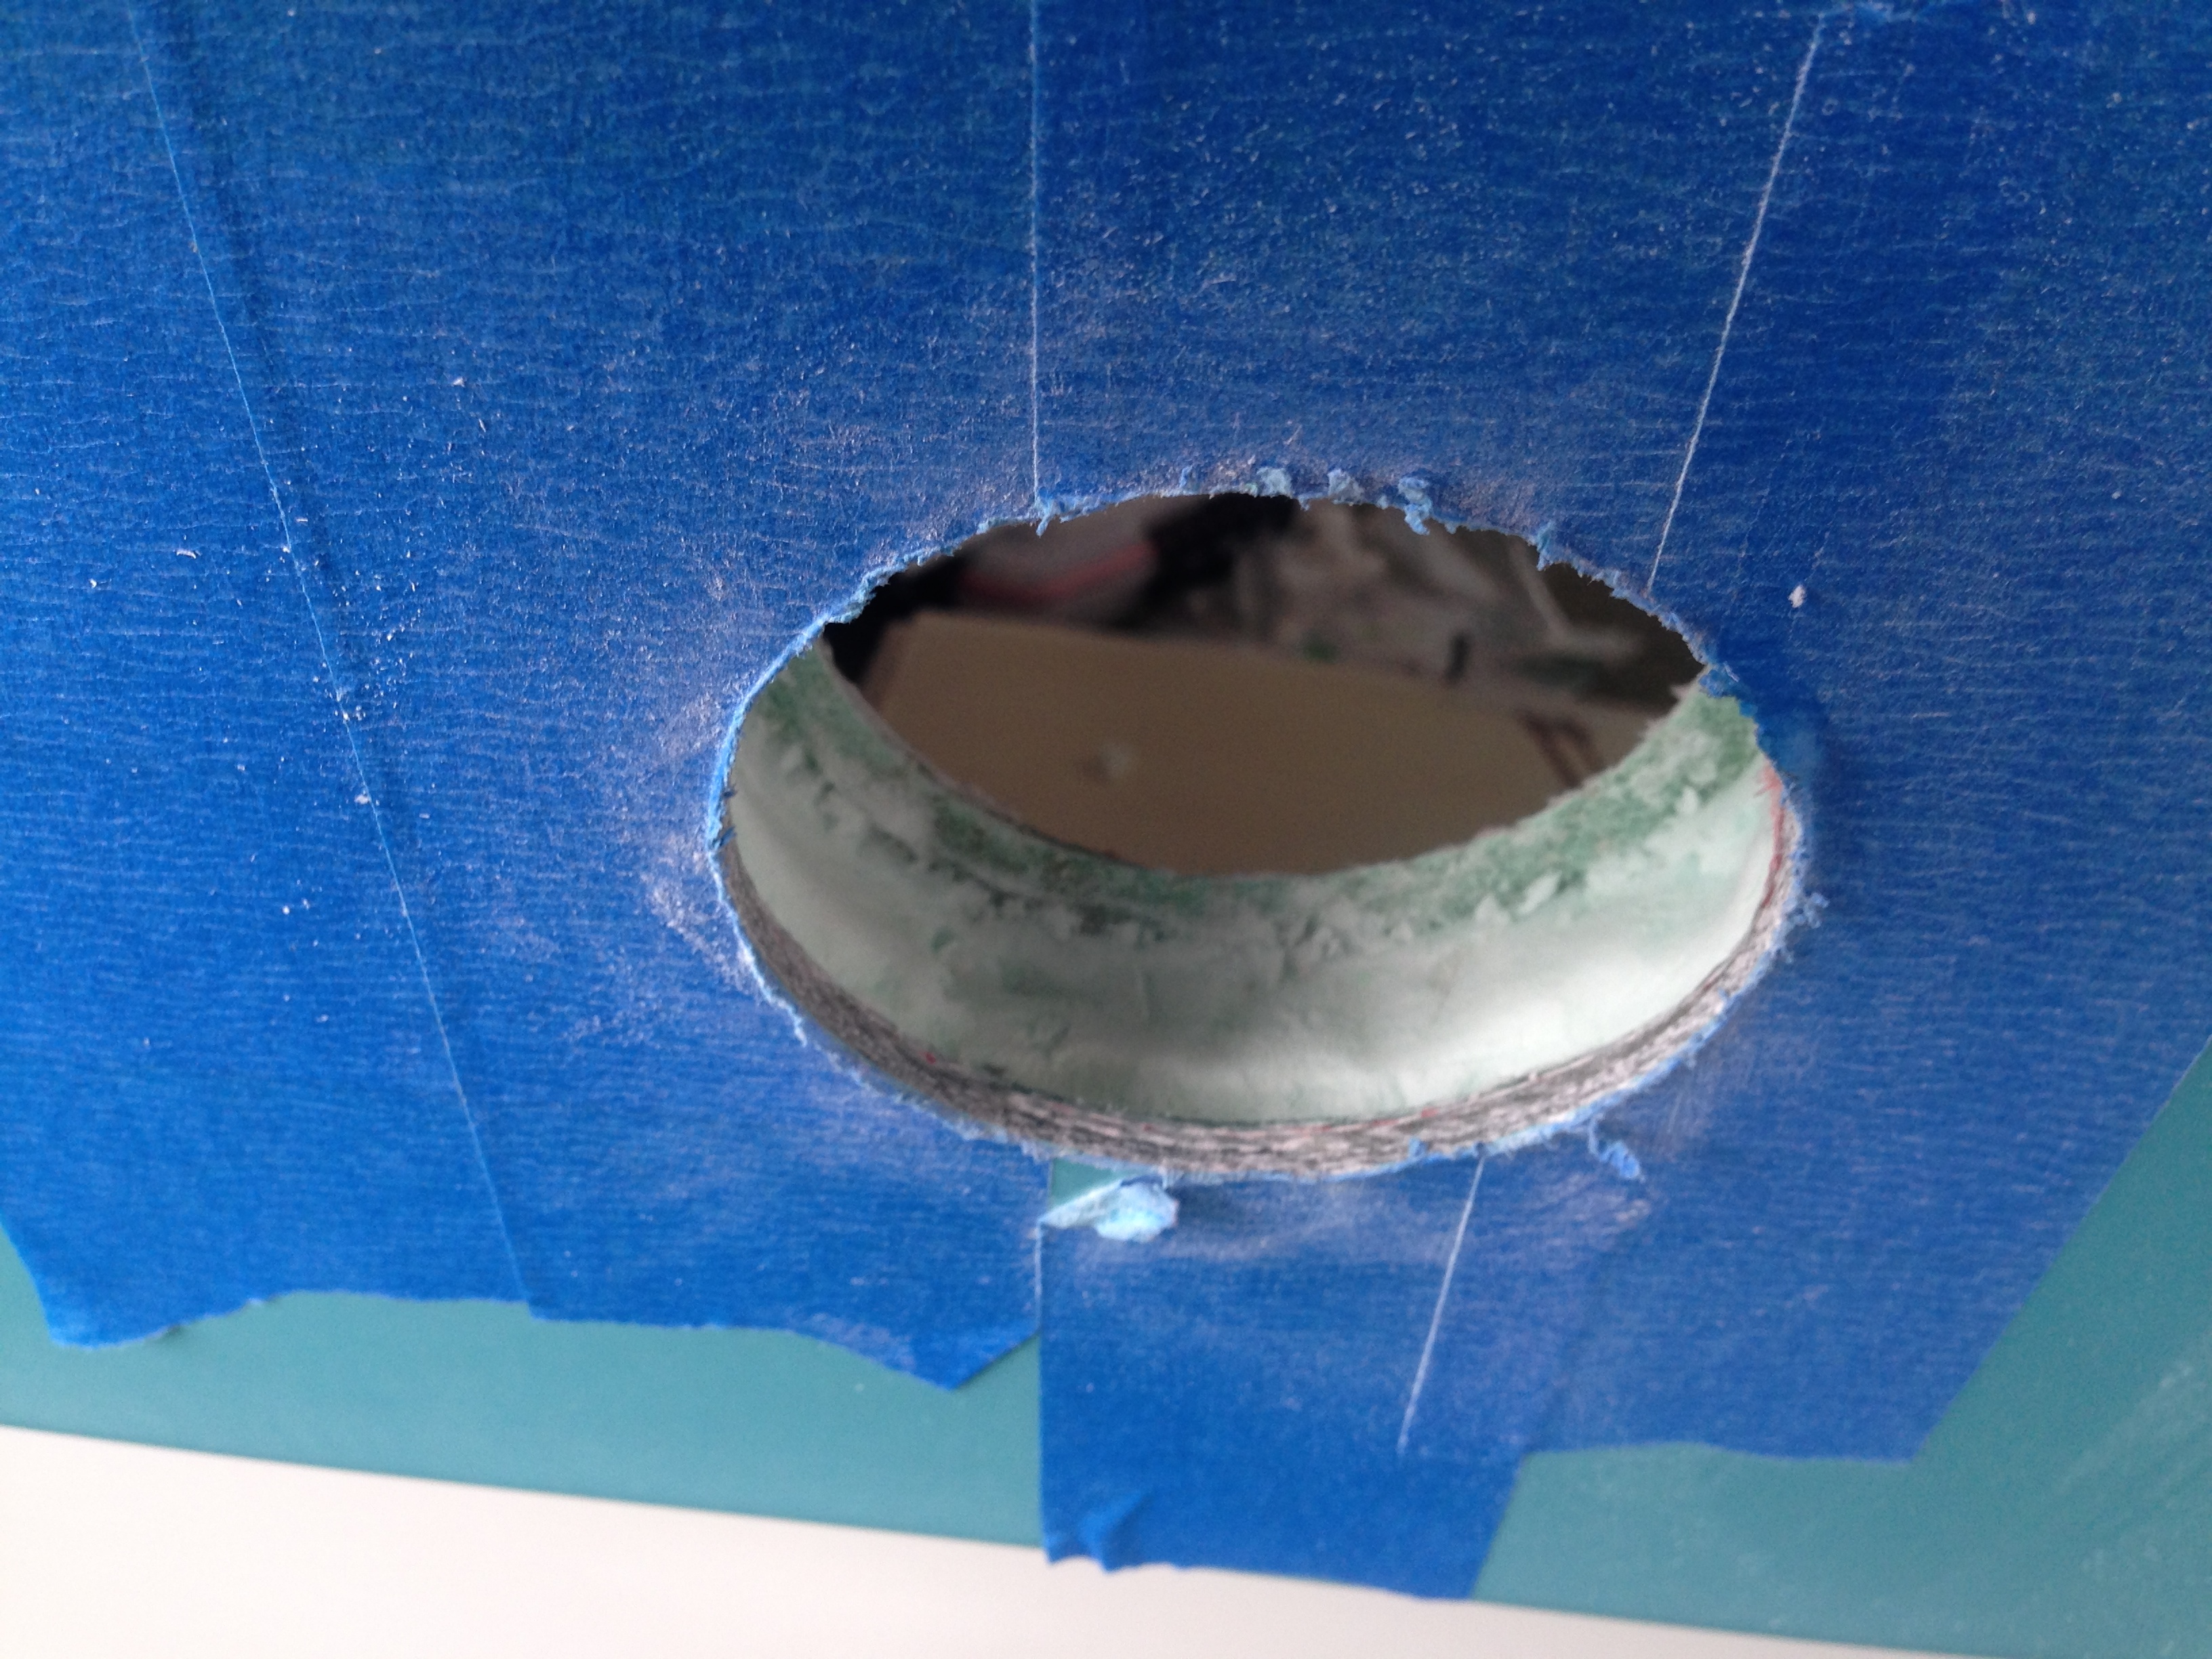
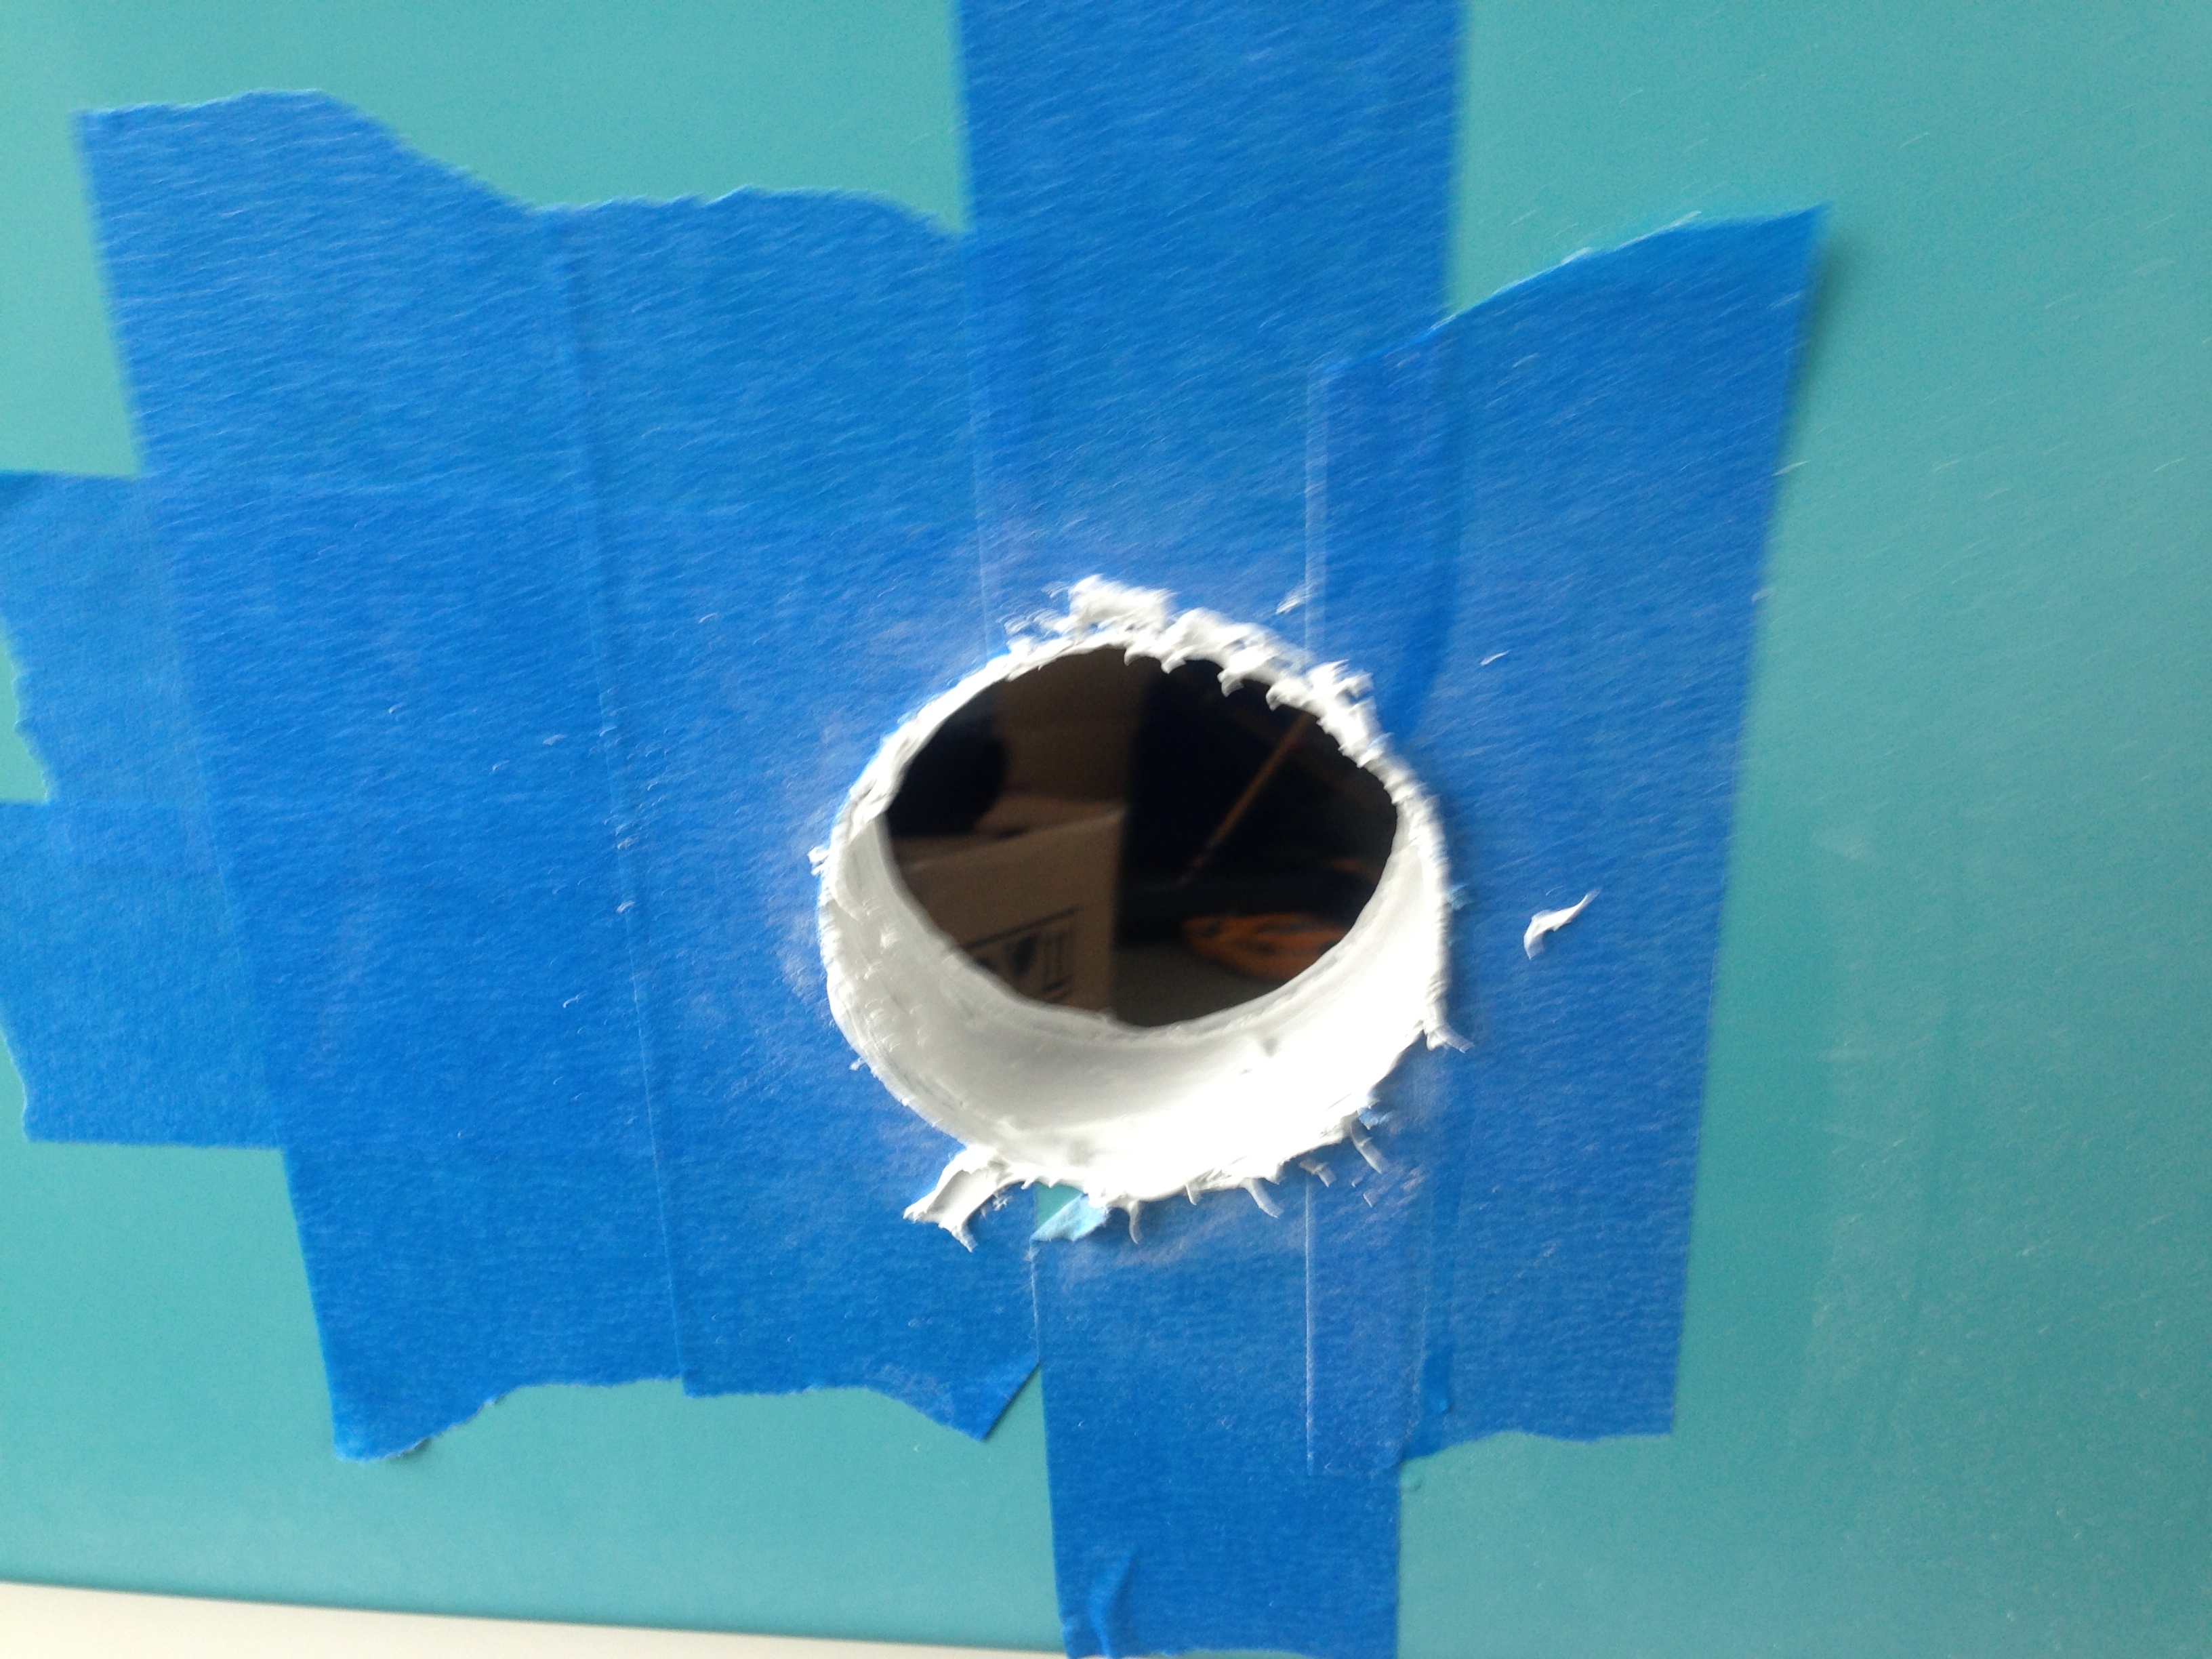
When the cut was complete, there I was with an enormous hole in the side of my boat, and thanks to the time I spent on layout and measuring it was exactly where I wanted it. At this point, I had some extra steps before I could go on and install the thru-hull.
Jolly Mon’s hull is Pli-Cor, a construction method Tollycraft used for a few years, beginning in the late 60’s. The hull is foam-cored fiberglass. Considered “space-age” technology for the time, it created a light-weight but strong and rigid hull. You can read more about the construction method here.
To ensure the thru-hull ran through solid material, I cut the coring back about one half inch around the perimeter of the hole and filled the void with Marine-Tex.
 I allowed the Marine-Tex to set up overnight, and in the mean time, applied some paint to the inside of the locker and built a platform for the two portable fuel containers I’ll be using.
I’m limited by width of fuel containers that will fit inside the locker, but I was able to find a one gallon gasoline container that is the perfect width. The heater is rated to run for nearly twenty hours on a gallon of fuel, so having two gallons available will allow me plenty of run time. I’ve seen people use three gallon outboard tanks, but I just didn’t have space for one.
A challenge I had was how to get the fuel from the container to the heater’s fuel pump. I contemplated various fuel pickups and different tubing and fittings I could use with the container, but I came up with something simple that I think will work just fine.
The cap that comes with the container is open in the center, intended to be used with a pour spout. I picked up a rubber plug that fit snugly in the mouth of the container. To allow the threads of the cap to engage the threads of the container, I needed to cut 3/8 inch or so off the upper portion of the plug. The result is a tight-sealing cap that works with the threaded cap ring. I then drilled two holes in the plug; one for the fuel pickup and another to serve as a vent. Problem solved.
The next morning, I sanded the cured Marine-Tex and installed the thru-hull, using two gaskets and high temp RTV sealant. Since I have a cored hull, I need to use a triple wall thru-hull.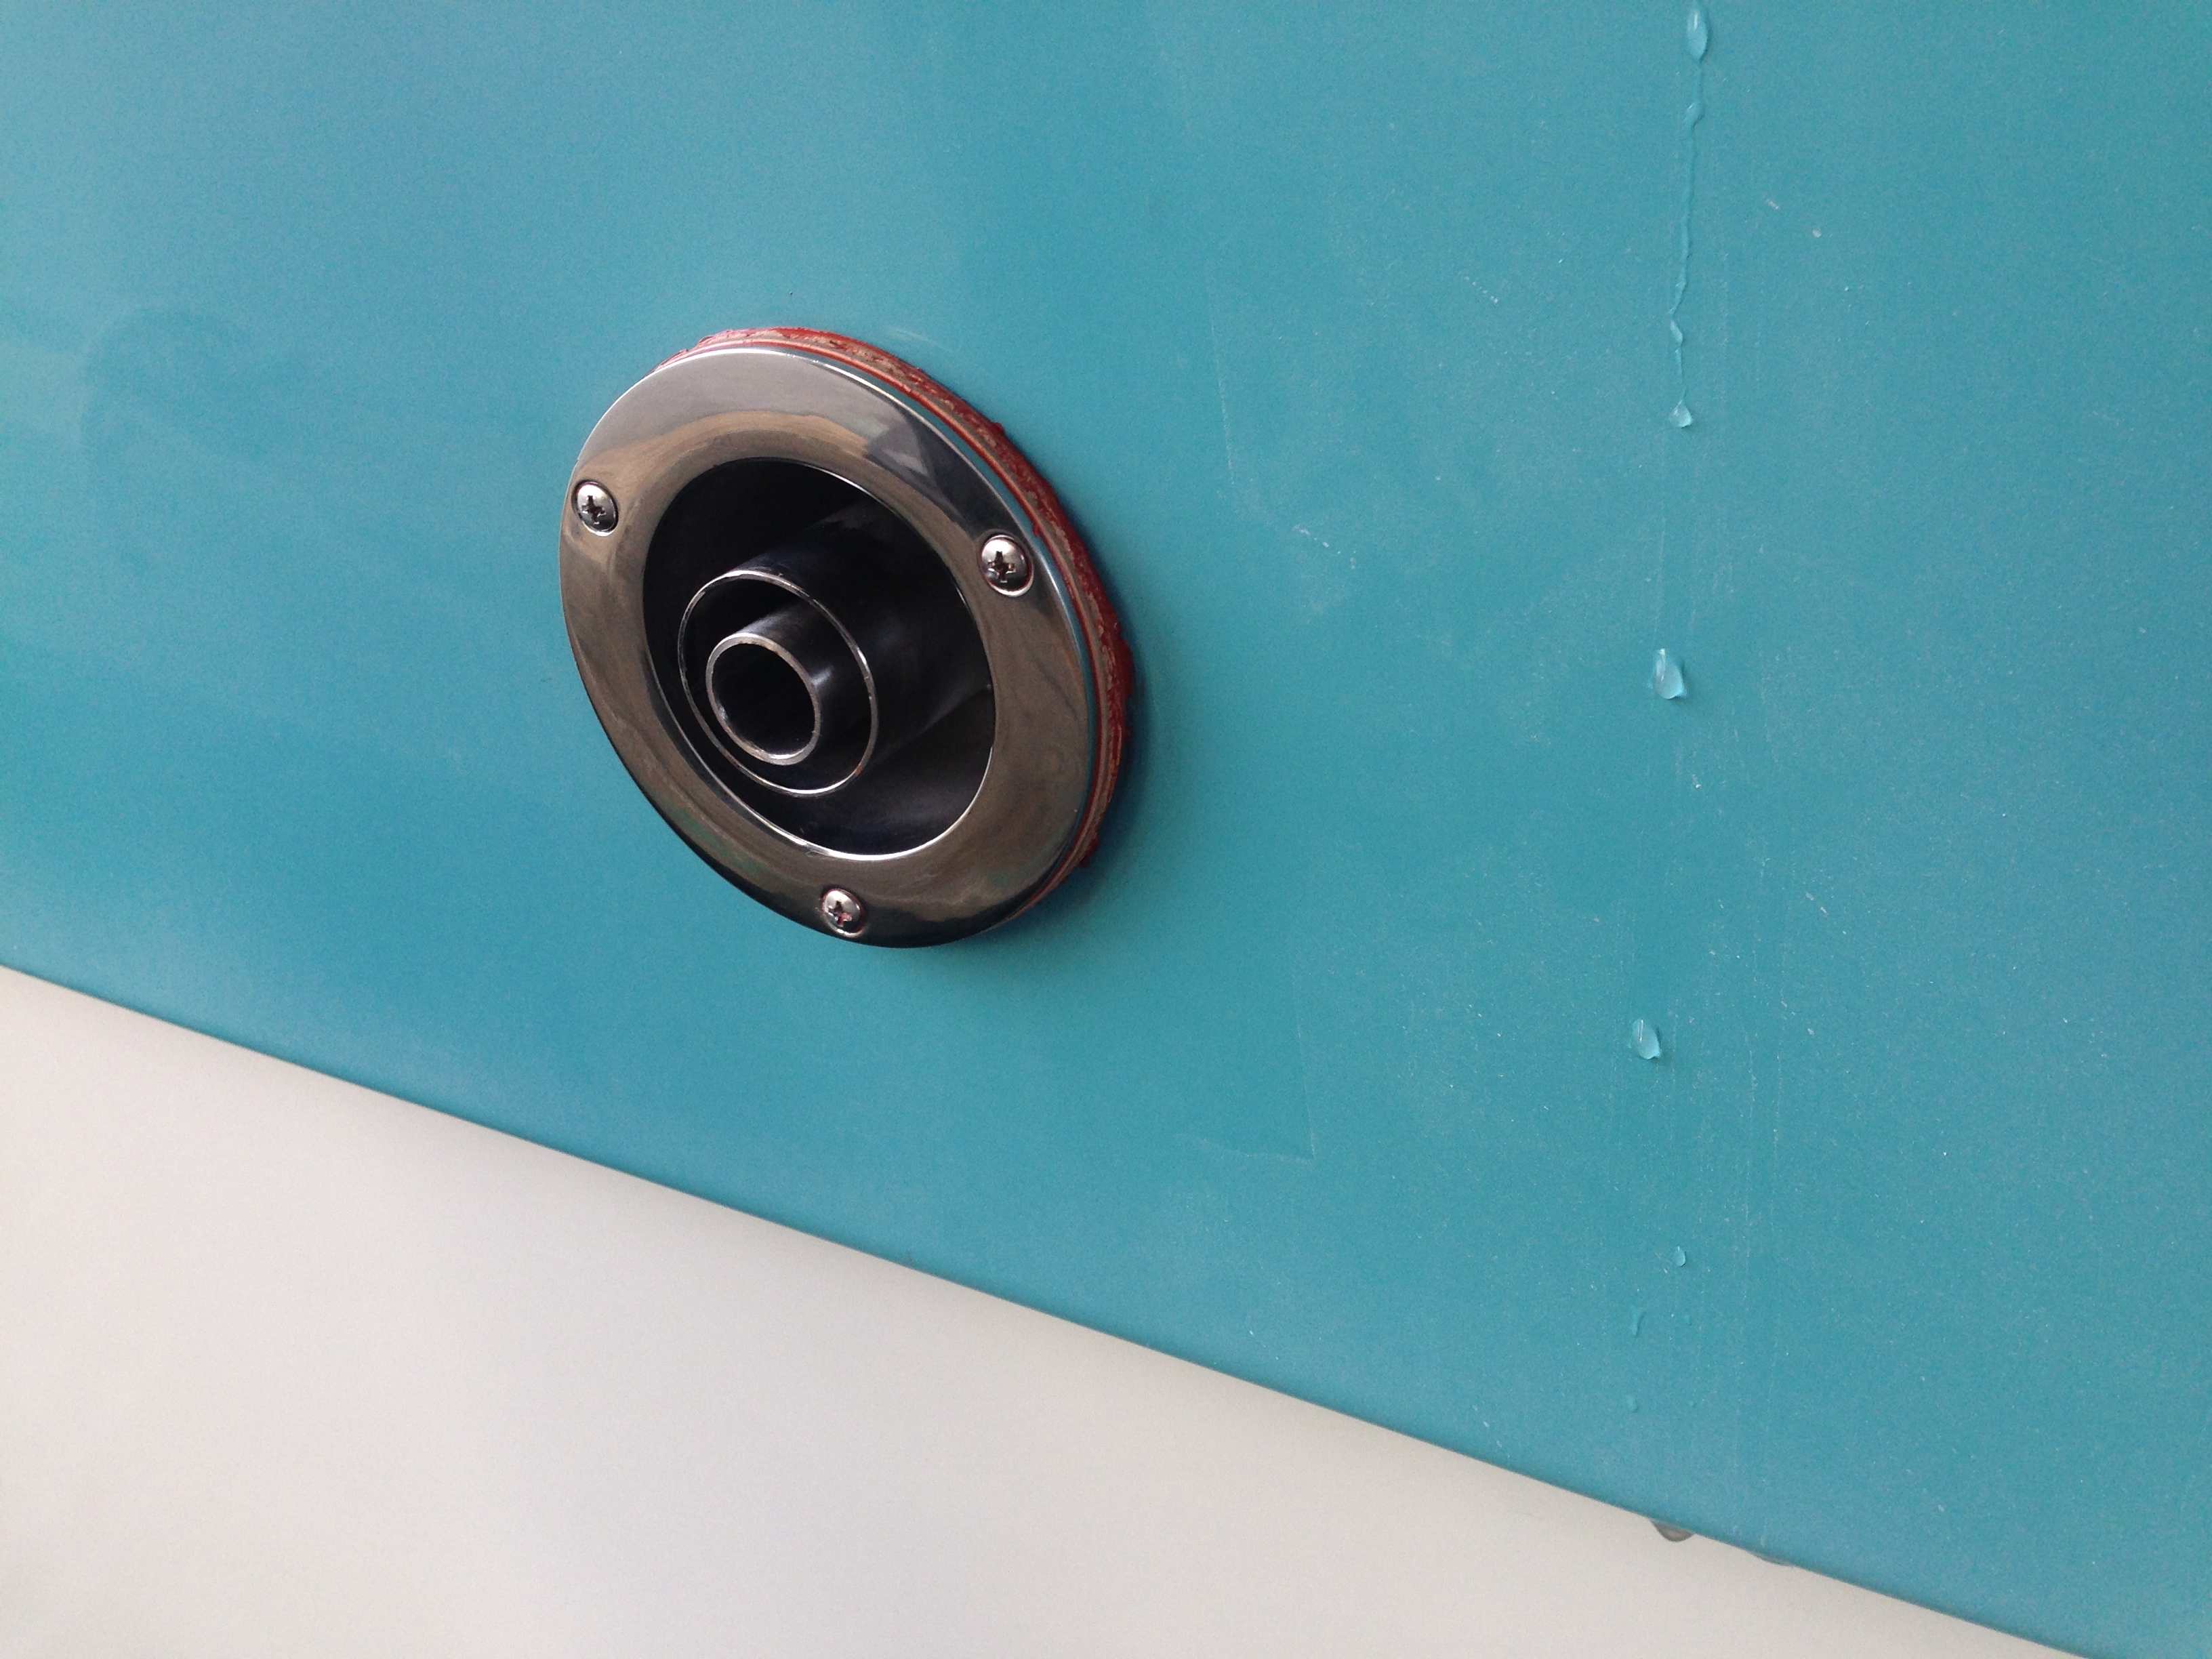
I then began installing components in the locker. I made a mounting pad for the Sure Wire board and the fuel pump that allowed access, but kept them out of the way and conserved space.
 At this point, I figured it was time to begin running ducting and installing heat outlets in the cabin. That meant more time with the hole saw and a little “boat yoga” to make cuts for the ducting runs.
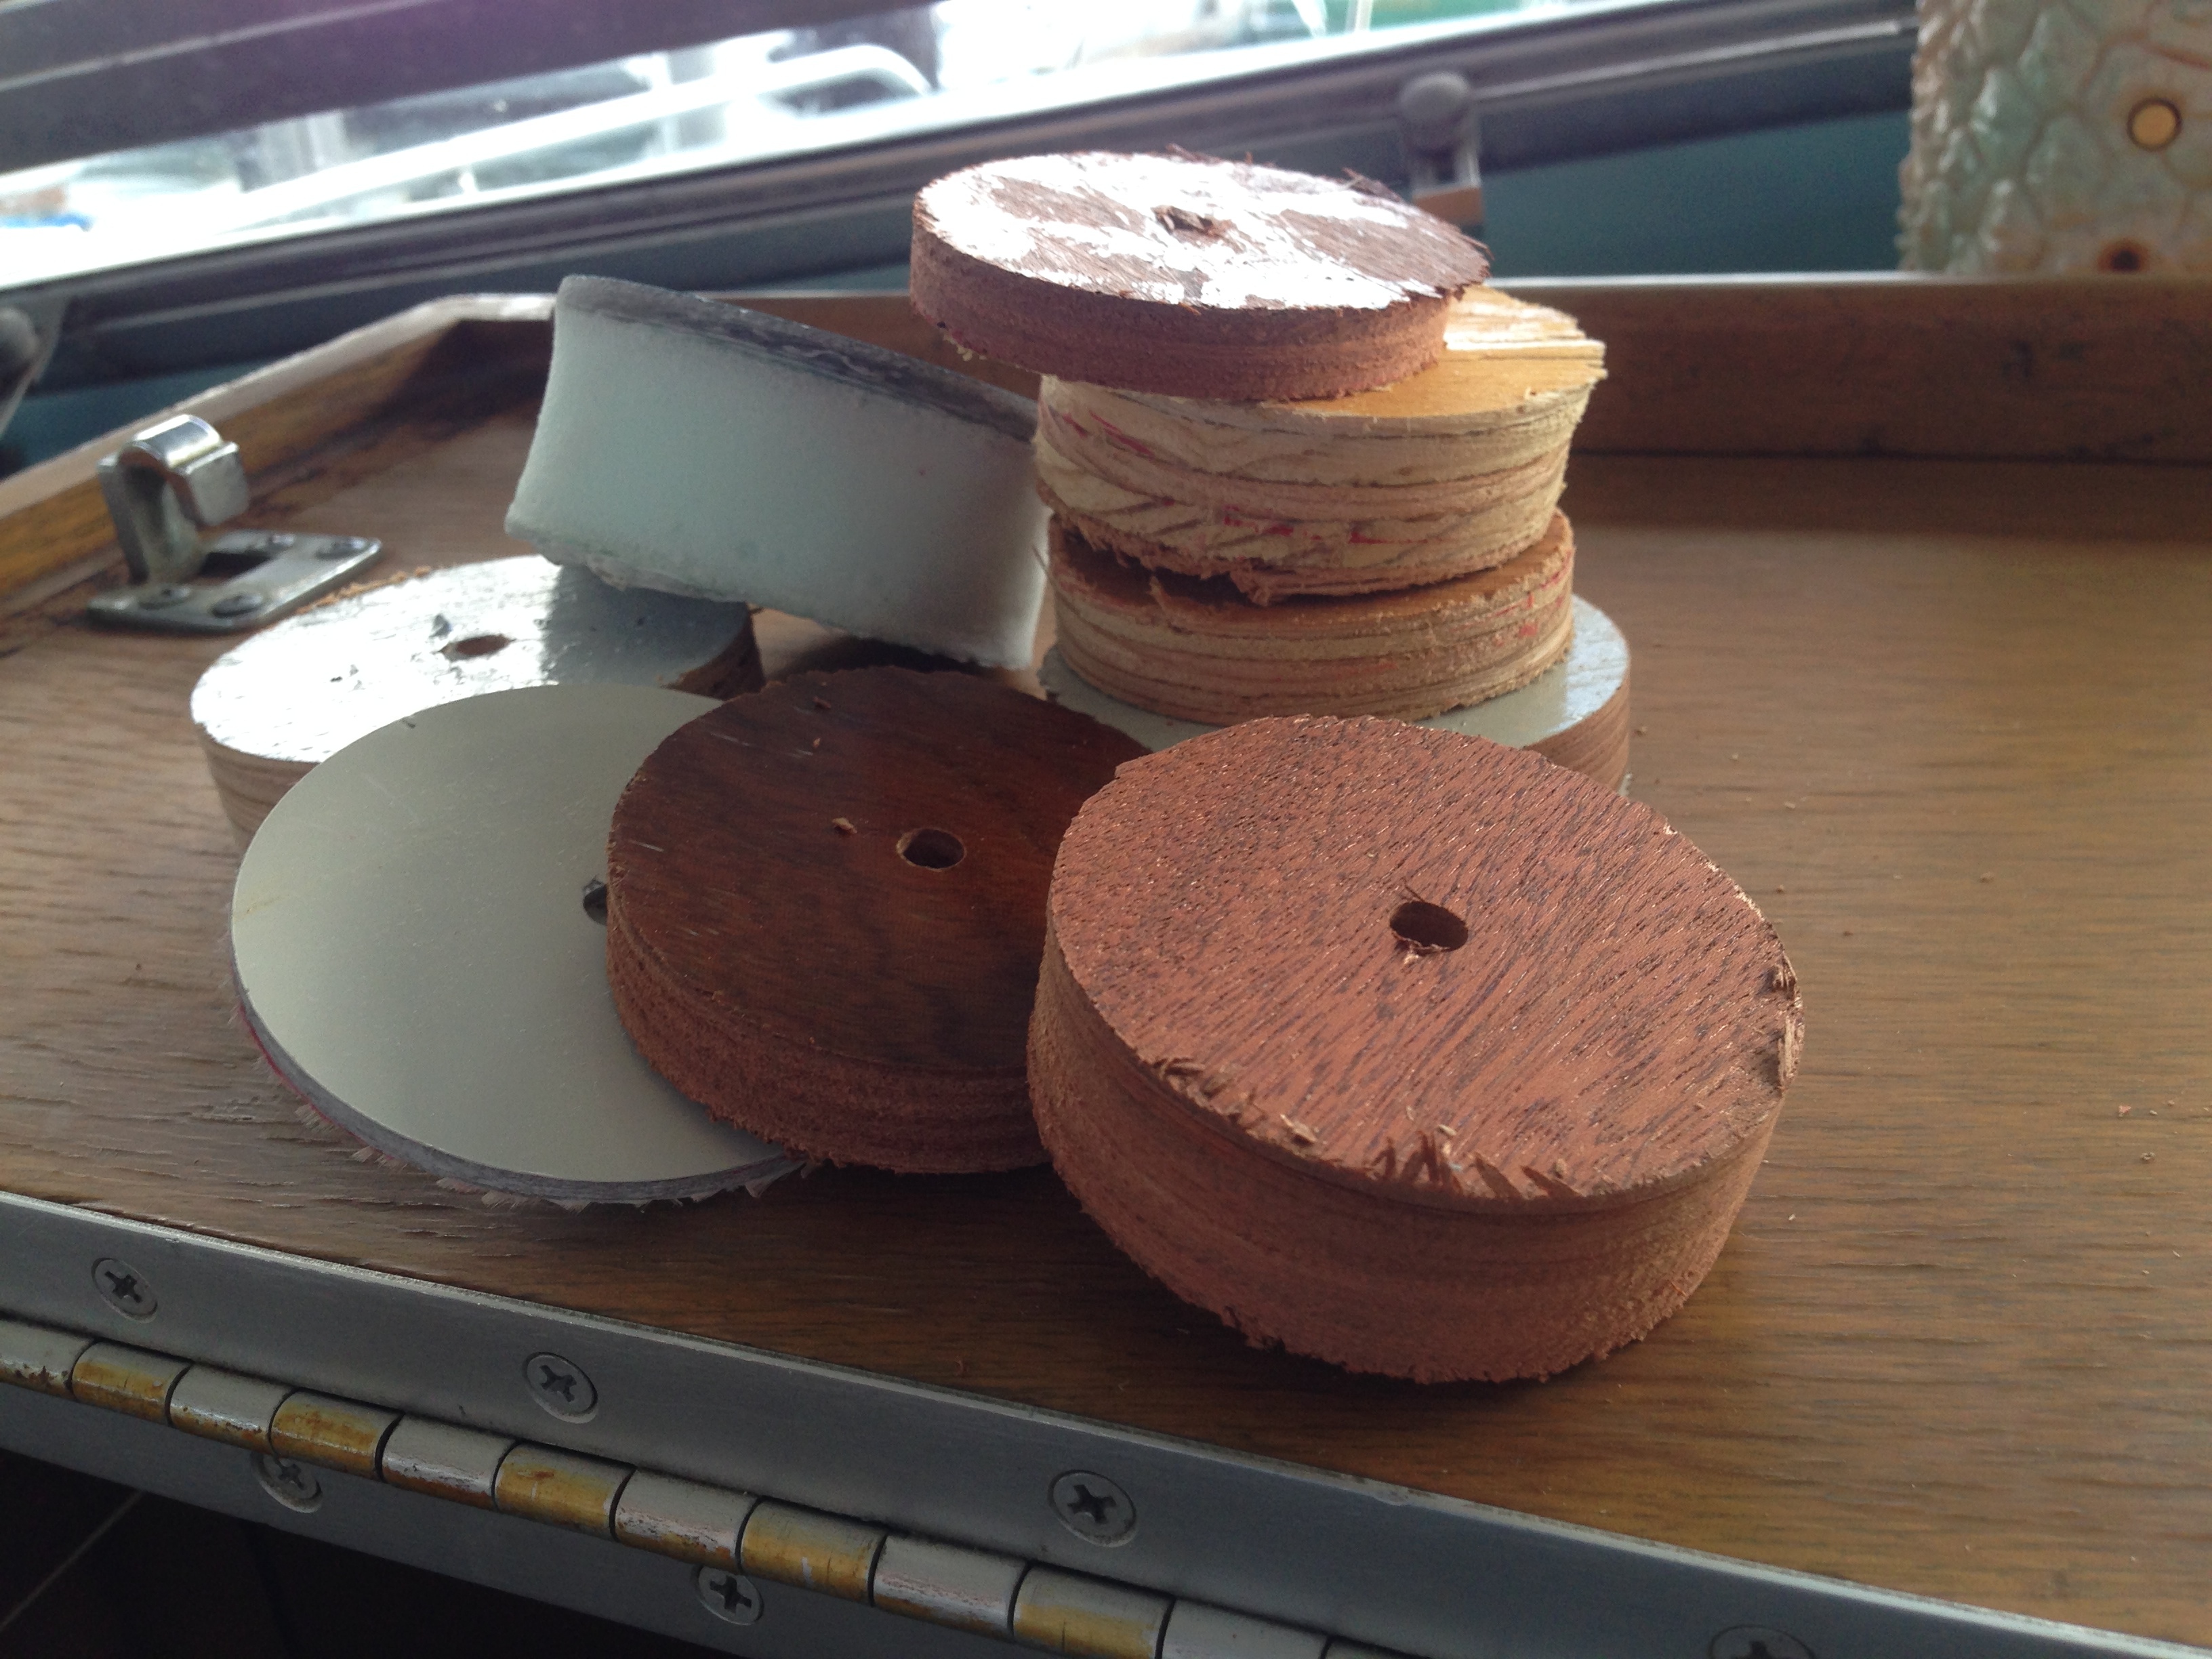
I estimated that I would need twenty feet of ducting, and in the end I had two one-foot pieces remaining. I installed an outlet in the toe space under the cabinet in the head, one in the toe space under the galley, and one in the vee-berth.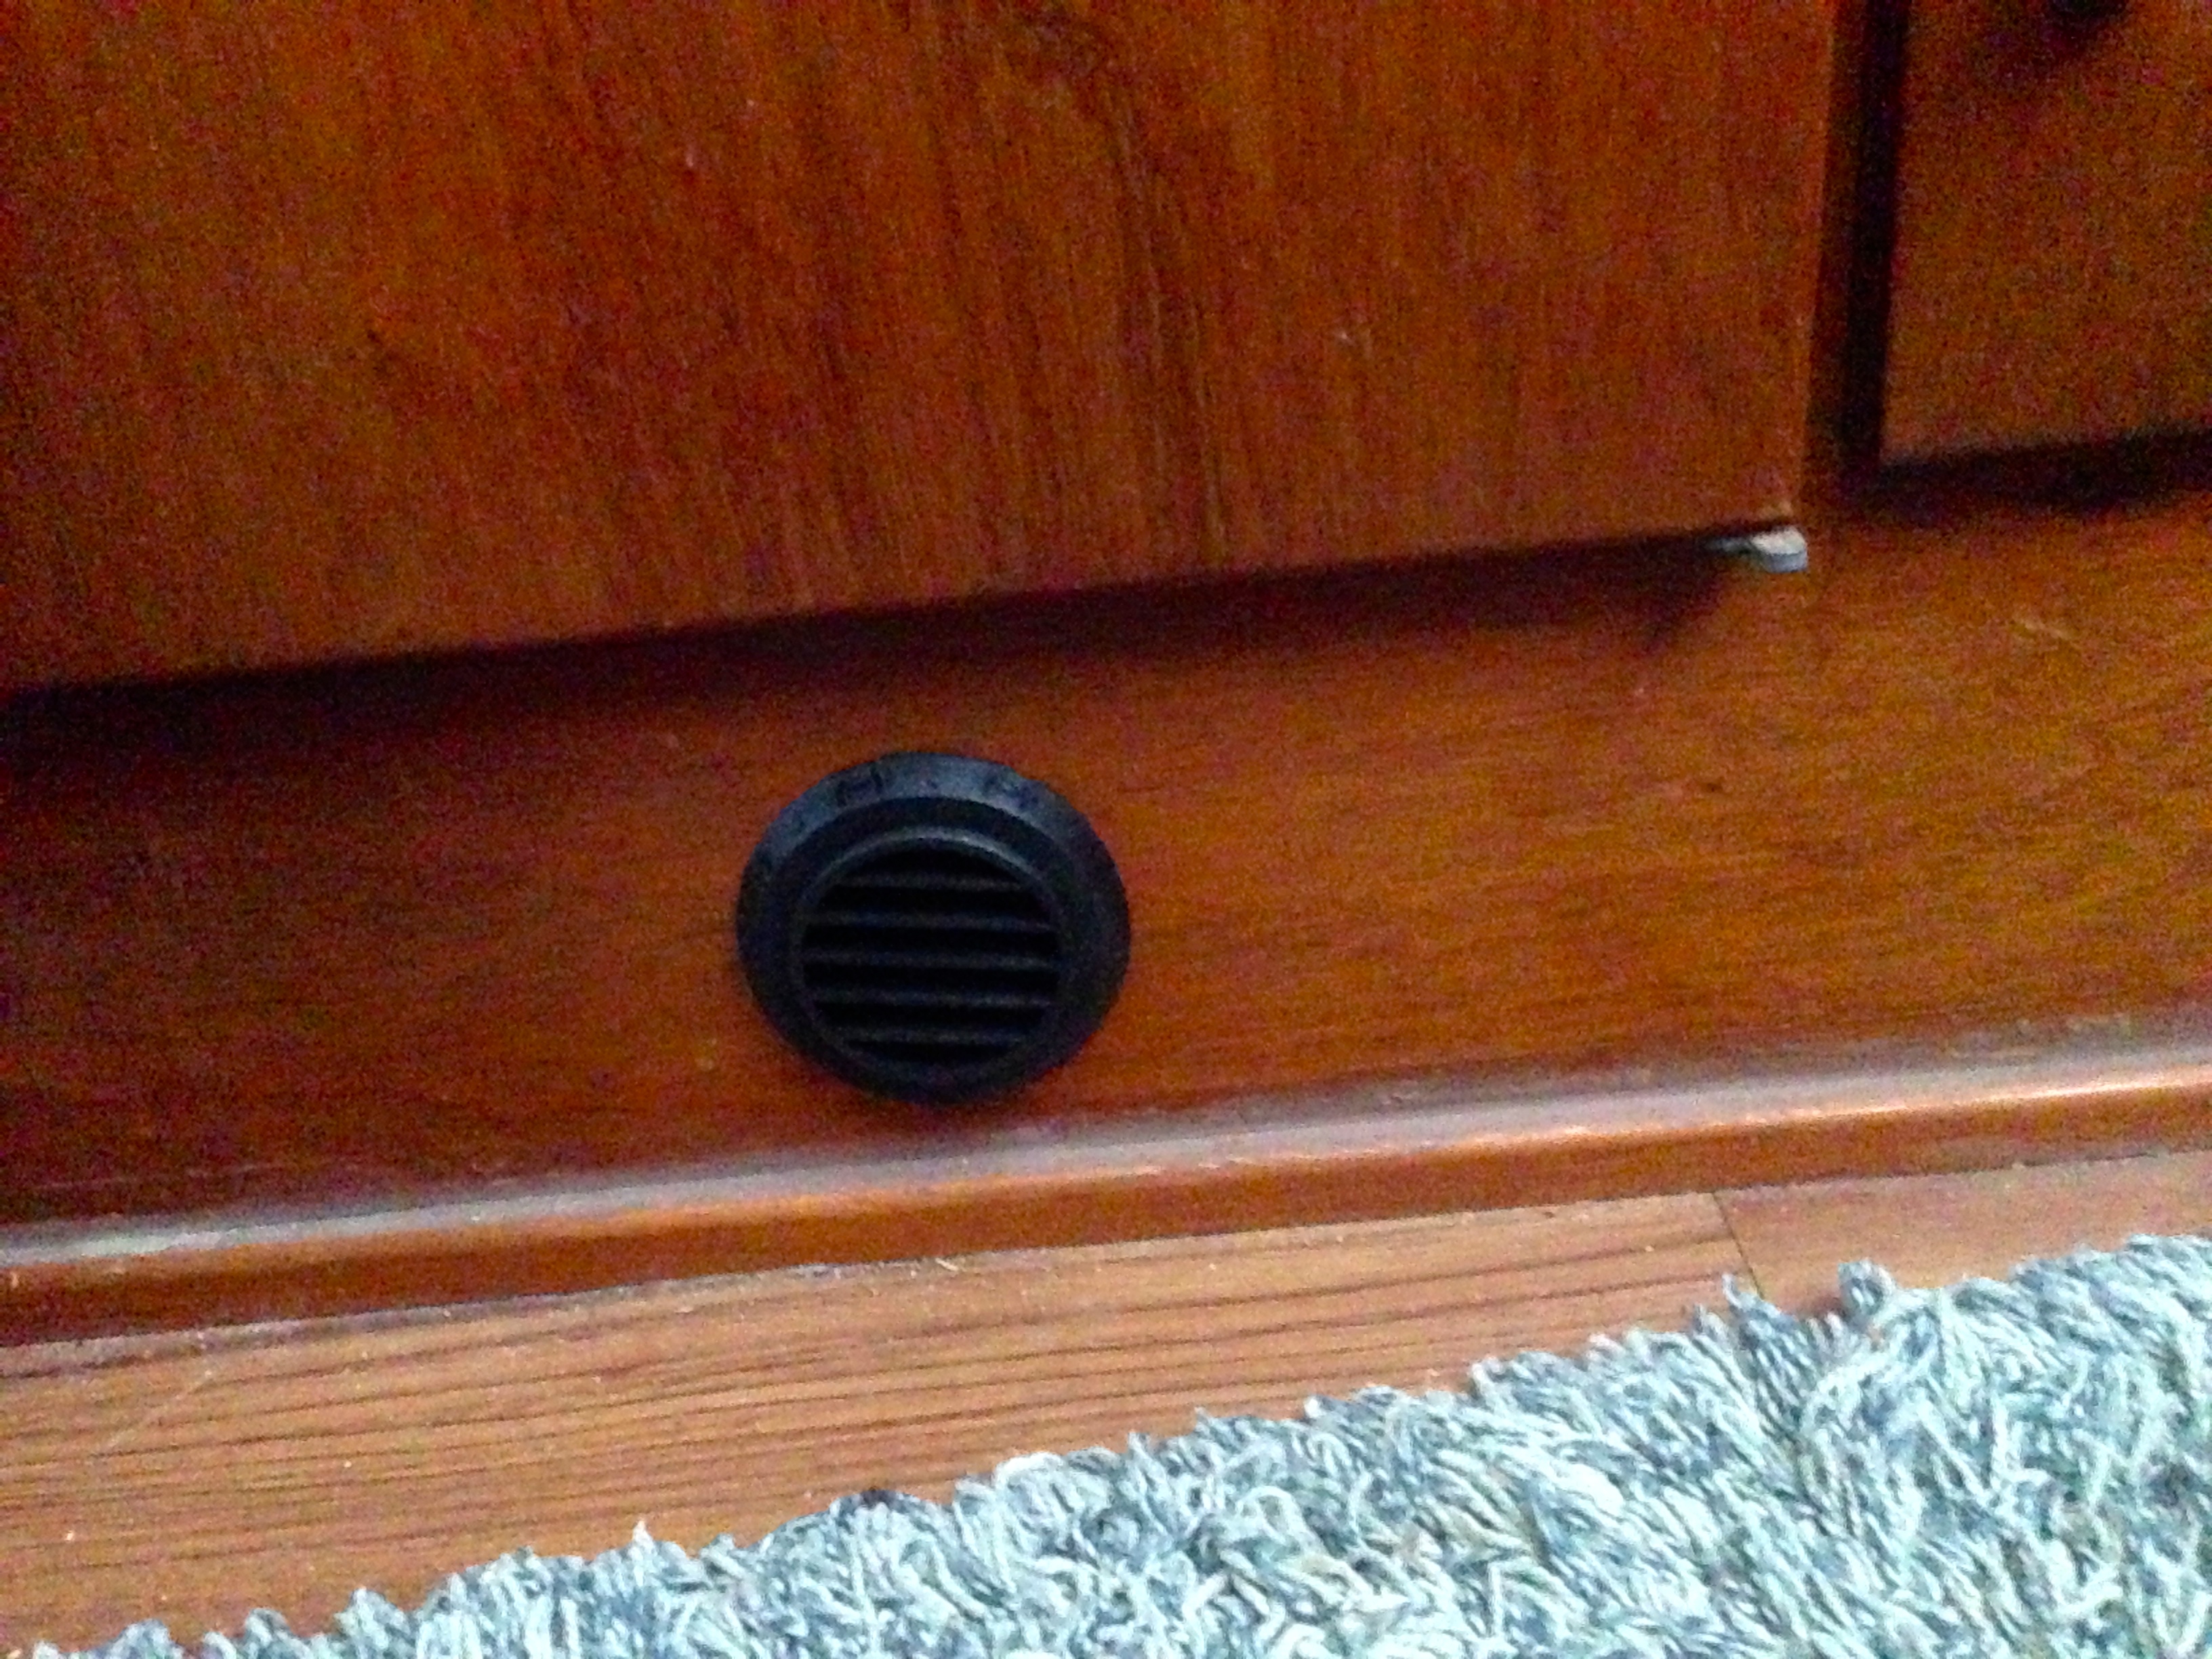
Next, I needed to pull wire. I ran #8 tinned wire from the main bus to the the Sure Wire board, installing a 30 amp breaker between. I then ran 16-3 tinned wire for the thermostat, which is conveniently located within toe-reaching distance from the vee-berth. Somehow, my estimates for length of wire runs were right on the money, and I ended up with very little left over.
Once I tidied everything up, I filled the diesel tank and primed the system. The Sure Wire board makes priming a breeze – simply hold down a button and the pump engages. Expel all the air from the line, connect it to the the fuel inlet on the heater, and it’s ready to go. I flipped the switch on the thermostat “on”, and moments later I heard the heater begin to make sounds. The fan began moving air and I could hear the “tick” of the pulsing fuel pump, and within seconds the heater came to life and began making heat. I darted below and felt the warmth already coming from the outlets. Outside, I could hear the whirring of the exhaust – a sound that I’ve always found comforting. I especially do now that it’s coming from my boat…
After securing a few sections of wire and hose runs, I’d call this project complete. It was a big job, taking quite a bit more time than I initially thought it would, as is usually the case it seems. I’m glad that I have the skills and had the time to do it myself, like most of the work that’s gone into my boat since I’ve owned her. However, those who have undergone an installation like this will agree, it’s not one for the faint of heart – especially if you’re afraid of a hole saw.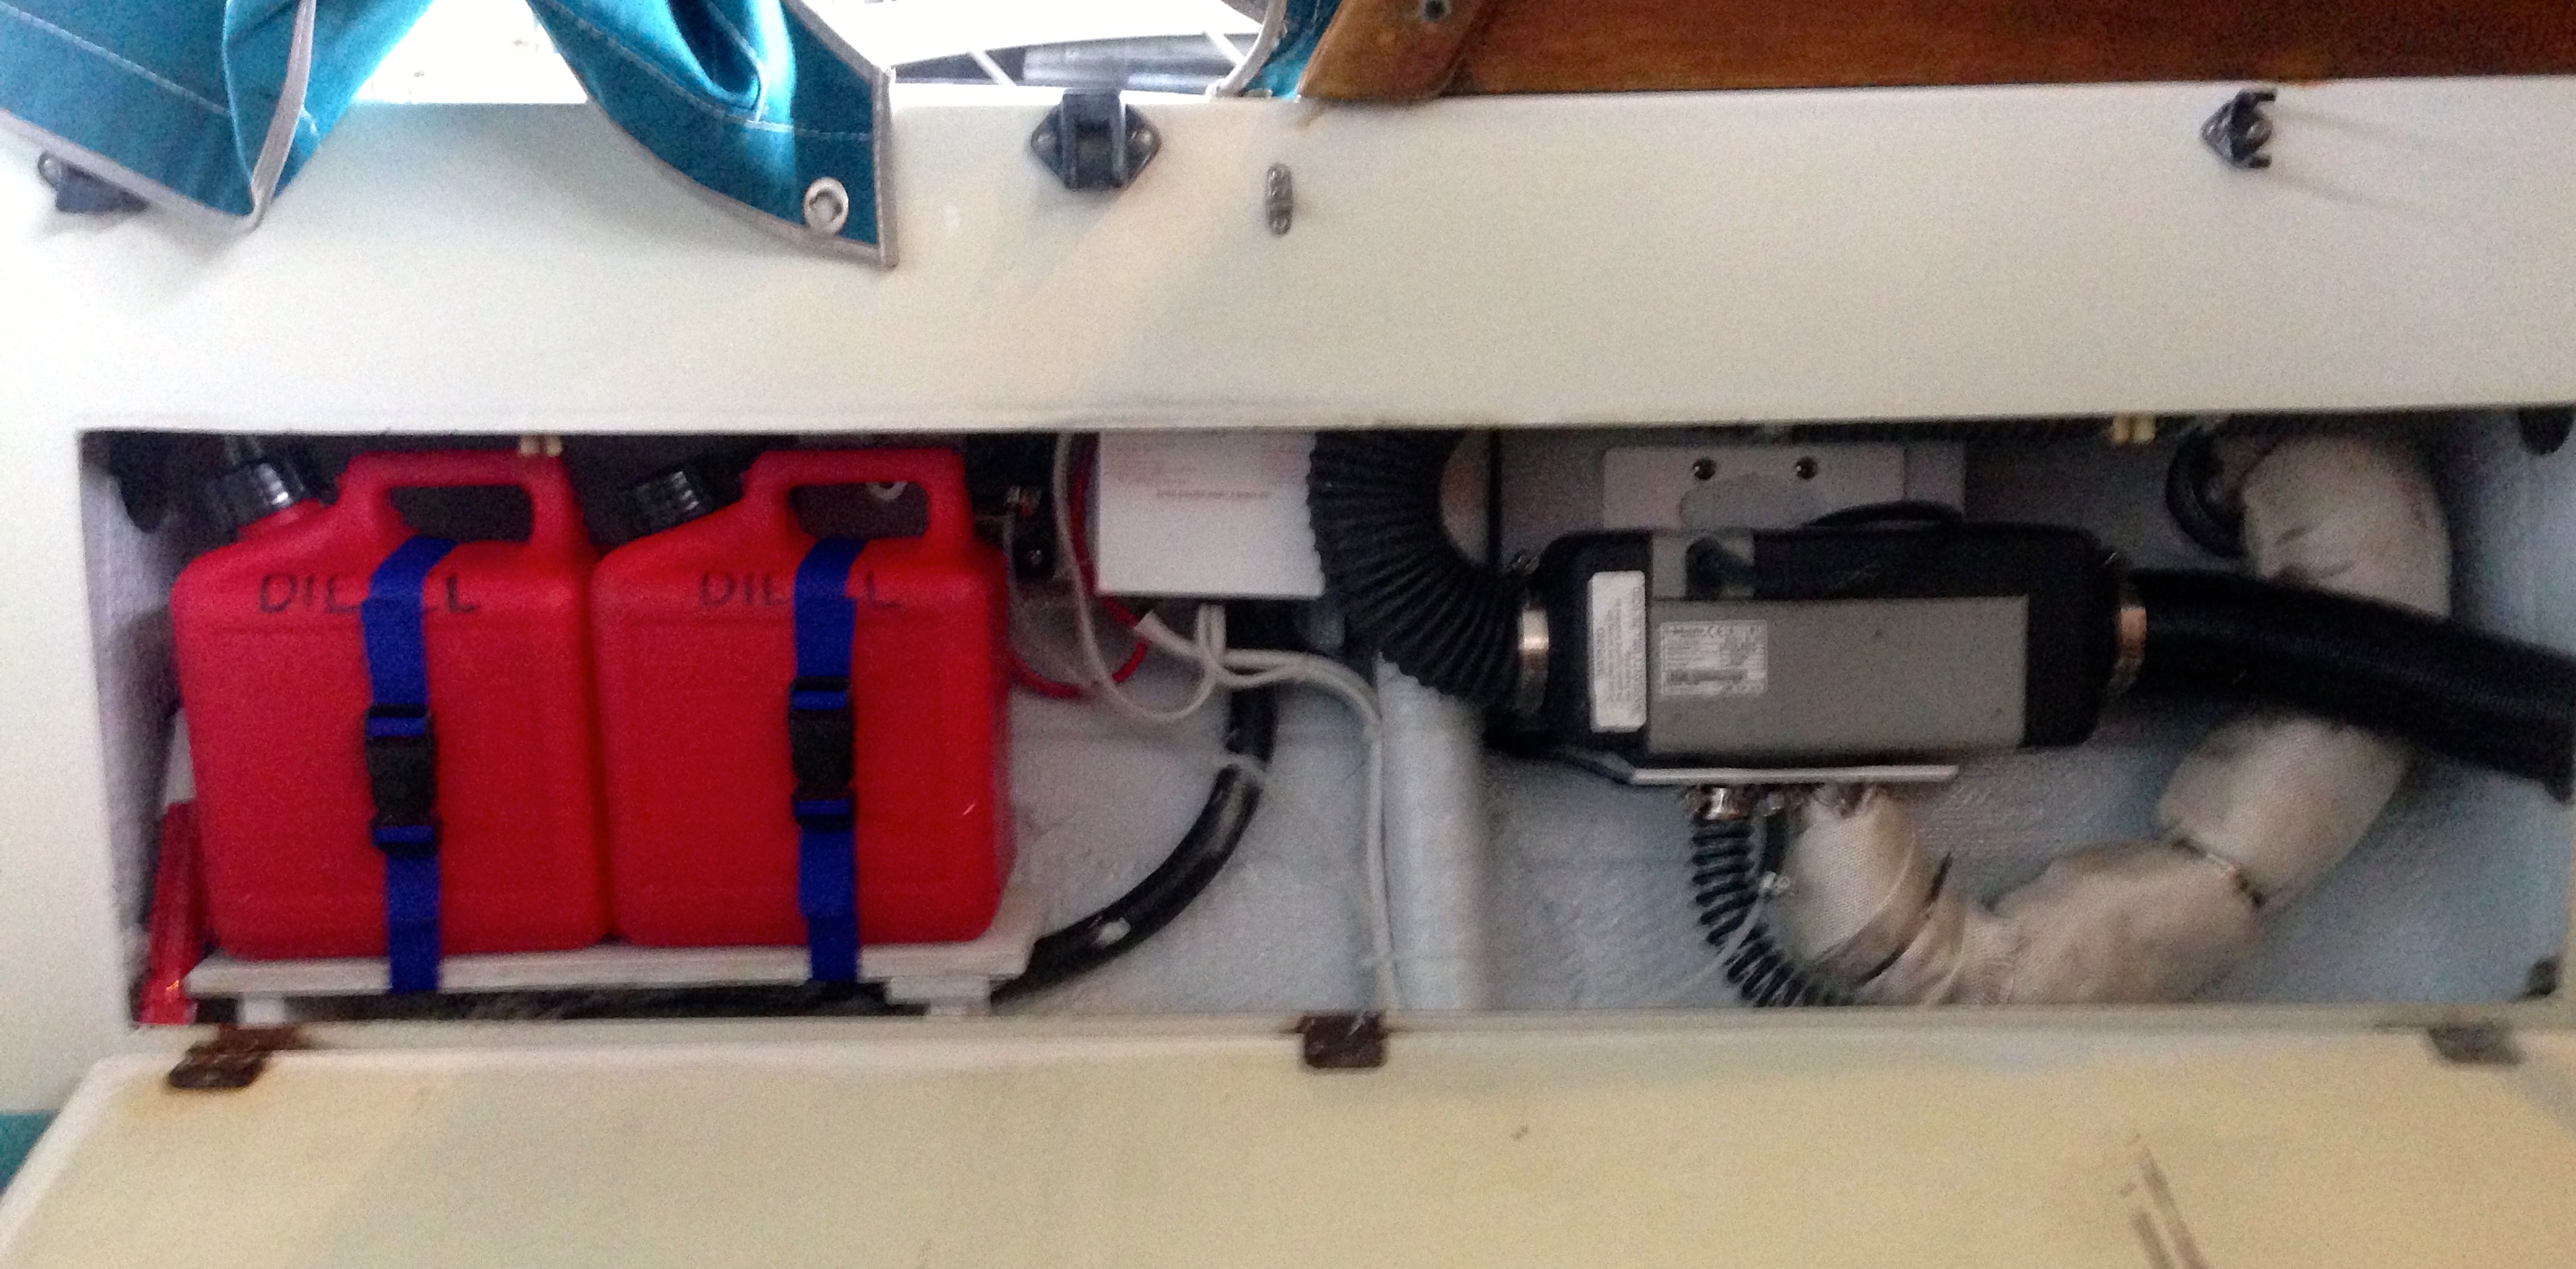
While giving the heater a little break-in run time, I stretched out on the vee-berth and flipped through a magazine. As the cabin warmed up nicely, I just may have accidentally taken a nap. I earned it.

Excellent job, Steve! We are taking on this project ourselves very soon, so it is encouraging to see how you did it! Plan, plan, plan some more, measure, measure, repeat as necessary, pant, boat yoga, wire, flip switch, nap. Did I miss anything? LOL – but seriously, very impressed!
Very well written Steve. Excellent installation too.
MURPH
Nice Installation Steve. Now that you’ve got a bit of heat it’s time to make your boat really comfortable. Focus on proper ventilation. This will reduce diesel consumption and keep your boat dry. My book The Warm Dry Boat may help you.
Rog
Roger,
Is it possible to get your book legally in PDF or digitally in some other way.
Regards,
Per Eriksson, Sweden